Share My Creation Pen&Paper: PWCT for Basic ABMaterial WebApps

Pen&Paper Explained.png


The intension of Pen & Paper is the creation of ABMaterial WebApps as depicted in the drawing above. This was developed as a pet project out of a personal need to create ABMaterial WebApps. So far everything has gone well with the outputs.

1. The ABMaterial Library comes out with an XML file that has vast information about the components (depicted as classed) including their properties (attributes), events and methods. Any Library viewer is able to access these too.
2. These classes are represented as property bags in Pen & Paper so that I can create any component by just changing the various attributes, whether true/false, specifying text etc. The way the components are built, initialized and added to pages/containers/modal sheets has been explained in detail in the ABMaterial Demo, where all of this started.
3&4. On creating an ABM project with Pen & Paper, two databases are created, one to store the project definition (pages and component structures i.e. propertybags) and the other a production one that the data will be stored in. These are both in SQLite. Pen & Paper has functionality to perform a DAO (Data Access Object) link for each backend table and fields you want to link a component to. This is essence creates a CRUD code base. This was inspired by the ABMCRUD generator that produces a structure of ones ABMTable and ABMModal sheet with the specific input components.
5. On Project Build, Pen & Paper produces a complete B4J application including the source code that can be compiled to generate a working version of an ABM Web Application.
6. Pen & Paper does not come bundled with ABMaterial, is not affiliated with ABMaterial and to compile any Pen & Paper project to a fully fledged working ABM Webapp, you need the ABM Libraries. It is just a helper tool to elimitate the repetitive nature of creating projects, pages, containers, modalsheets, etc, in a programming without coding technology fashion. It does NOT in anyway replace ABM or intends to replicate its functionality as it just generates B4J code for your ABM application, this being achieved by use of property bags to create your components and generate the respective source code based on your options, eliminating the need to type code and what anyone gets out is the basic stuff to make ones project work. Not everything ABM is here anyway.

As everything that has a beginning has an end. This personal enjoyment project will stop being maintained as other things will evolve. As on 31 March 2018, there is no intention to advance this any further than what it is. Thanks for B4J this project was possible.

Steps in using Pen & Paper
  • Get everything related to Pen&Paper from this DropBox Link. Get executable from jar folder.
  • See videos below on usage and related articles
  • Please note that not all ABM components are covered with Pen&Paper as yet.

2018 Tutorials

Creating a Sign In Modal Dialog with Options

Interesting Tutorials
2017-12-20

Creating a simple 'Contacts' ABMaterial WebApp - Part 1
Creating a simple 'Contacts' ABMaterial WebApp - Part 2
Creating a simple 'Contacts' ABMaterial WebApp - Part 3

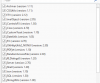
Below are some of the articles touching on code generated by Pen&Paper.

ABMaterial WebApps created with Pen&Paper

Bible.Show

CodeProject Article

Creating the Bible.Show WebApp with ABMaterial

Some YouTube Links


Pen&Paper is built using B4J and distributed with jMashProjectProfile.

NB: You will need the ABMaterial Framework to compile the generated source code.
 

Attachments

  • abmaterial.gif
    abmaterial.gif
    53.1 KB · Views: 13,343
  • MyMaterialLibraries.png
    MyMaterialLibraries.png
    16.4 KB · Views: 1,070
Last edited:

Mashiane

Expert
Licensed User
Longtime User
This is the method in MyMaterial.Show that does all the magic of creating the sidebaritems and sidebarsubitems...

B4X:
' build the side menu items from selected pages in the app
' this menu will become the universal menu in the app
' you can however indicate whether each page can show the menu or not
Sub BuildAutomaticSideMenu
    ' select all pages where they should be shown on the side menu without a sidebaritem specified.
    ' the sidebar item indicates the parent sidebaritem that this page will be child to
    ' the tabindex indicates the order of appearance in the navigation bar
    Dim pgs As List
    Dim pgsTot As Int
    Dim pgsCnt As Int
    Dim pgsMap As Map
    Dim inserts As List
    Dim xComponent As Map
    Dim props As Map
    Dim propsJSON As String
    Dim sPageName As String
    Dim fNode As TreeItem
    Dim sidebaritem As String
    inserts.Initialize
    ' select all pages and order them by tabindex
    ' the pages must have showonsidemenu checked to be created
    pgs = DBUtils.ExecuteMaps(jMash.jSQL, "select * from pages where onsidemenu = 1 and active = 1 order by tabindex", Null)
    pgsTot = pgs.Size - 1
    For pgsCnt = 0 To pgsTot
        pgsMap = pgs.Get(pgsCnt)
        sPageName = pgsMap.Get("pagename")
        sidebaritem = pgsMap.Get("sidebaritem")
        If sidebaritem = "null" Then sidebaritem = ""
        ComponentKey = "Side Menu." & sPageName
        ' check if the component already exists
        If DBUtils.RecordExists(jMash.jSQL,"Components","ComponentKey", ComponentKey) = False Then
            xComponent.Initialize
            xComponent.put("PageName", "Side Menu")
            xComponent.put("ComponentID", sPageName)
            xComponent.Put("ComponentKey", ComponentKey)
            xComponent.Put("TabIndex", pgsCnt)
            ' if the page has a sub bar item, made it an ABMSideBarSubItem
            If jMash.Len(sidebaritem) = 0 Then
                xComponent.Put("ComponentType", "ABMSideBarItem")
            Else
                xComponent.Put("ComponentType", "ABMSideBarSubItem")
            End If
            ' define the parent sidebaritem... "ActionButton is just used as a parent determinant
            xComponent.Put("ActionButton", sidebaritem)
            xComponent.Put("Active", "1")
            xComponent.Put("Static", "1")
            props.initialize
            props.Put("Text", pgsMap.Get("pagetitle"))
            ' define default side bar item icon
            props.Put("IconName", "mdi-action-list")
            props.Put("URL", "")
            ' navigate to the same page being processed
            props.Put("NavigateTo", sPageName)
            ' if it does not have a sidebar, put a divider infront
            If jMash.Len(sidebaritem) = 0 Then
                props.Put("DividerInfront", "1")
            End If
            props.Put("DividerAfter", "0")
            props.Put("DividerAfterTheme", "")
            props.Put("DividerFrontTheme", "")
            propsJSON = jMash.Map2Json(props)
            xComponent.Put("componentproperties", propsJSON)
            inserts.Add(xComponent)
            ' add to the tree
            fNode = jMash.TreeViewSearch(treeProject.Root, ComponentKey)
            If fNode.IsInitialized = False Then
                nComponent.Initialize("treeProject", "Side Menu." & sPageName)
                nComponent.Image = cpImage
                SideItems.Children.Add(nComponent)
            End If
        End If
    Next
    DBUtils.InsertMaps(jMash.jSQL, "Components", inserts)
End Sub
 

Mashiane

Expert
Licensed User
Longtime User
MyMaterial.Show: What's New : ABMSideBarSubItem Designer

The previous posts spoke about adding the Side Menu items automatically to your app. We also touched on the SideBarItem designer. The SideBarSubItem designer is not so different from its parent. The difference is just the return value of the top item.

Figure 1

Side Menu.mysignaturepad.png


Figure 2

Side Menu.mysignaturepadSourceCode.png


The SideBarSubItem here was automatically generated after we configured our pages and indicated that they should show in the side menus and also linked the parent sidebaritems to them.

Remember for the automatic compilation to work...

1. Create the parent sidebaritems first. You can do this by only setting up the pages that you want as parents on the side menu, then select side menu on the tree. You can also use Components 3 menu to add such components.
2. Create the sidebarsubitems second. After you have automatically created your parent items, set up the page properties for the children by indicating their Side Bar Item (Page Properties) properties and then select side menu on the tree to create the rest of the side menu items.
3. The third part of this will be the update of the navigation bars. The next post will explore more of this relationship between the page, navigation bar and side items.
 

Mashiane

Expert
Licensed User
Longtime User
MyMaterial.Show: Page, Navigation Bar and Side Menu Relationship

Figure 1

PagesNavigationSide.png


When you indicate a page as being "On Side Menu", you can also indicate that its also "Active Side Sub Return Name" on the navigation bar.
If such a page is referenced as a sidebarsubitem with "Side Bar Item", then the "Active Side Return Name" for the navigation bar will be set at such.
I have noted that I should not set my "bar type" to auto for my navigation bar when I have defined side bar and side bar sub items, this is also discussed in the demo docs. After all is said and done, after I finished setting up my side menu and navigation bar, it should look like this per source code...

B4X:
page.SetFontStack("arial,sans-serif")
Dim sbtopimg As ABMImage
sbtopimg.Initialize(page, "sbtopimg", "../images/logo.png", 1)
sbtopimg.SetFixedSize(236, 49)

page.NavigationBar.Initialize(page, "nav1", ABM.SIDEBAR_MANUAL_HIDEMEDIUMSMALL, "MyMaterial.Show > ABMPagination", True, True, 330, 48, sbtopimg, ABM.COLLAPSE_ACCORDION, "mashy")
page.PaddingBottom = 100
page.NavigationBar.ActiveSideReturnName = "DisplayComponents"
page.NavigationBar.ActiveSideSubReturnName = "mypagination"
page.NavigationBar.TopBarDropDownConstrainWidth = False
page.NavigationBar.AddSideBarDivider("")
page.NavigationBar.AddSideBarItem("Welcome", "Welcome", "mdi-av-radio", "../frmWelcome/frmWelcome.html")
page.NavigationBar.AddSideBarDivider("")
page.NavigationBar.AddSideBarItem("Controls", "Controls", "mdi-action-perm-media", "")
page.NavigationBar.AddSideBarSubItem("Controls", "mybuttons", "ABMButton", "mdi-action-list", "../mybuttons/mybuttons.html")
page.NavigationBar.AddSideBarDivider("")
page.NavigationBar.AddSideBarItem("frmLogin", "Login", "mdi-action-list", "../frmLogin/frmLogin.html")
page.NavigationBar.AddSideBarSubItem("frmLogin", "test", "Test SideBarSubItem", "", "")
page.NavigationBar.AddSideBarDivider("")
page.NavigationBar.AddSideBarItem("InputComponents", "Input Components", "mdi-action-launch", "")
page.NavigationBar.AddSideBarSubItem("InputComponents", "myswitch", "ABMSwitch", "mdi-action-list", "../myswitch/myswitch.html")
page.NavigationBar.AddSideBarSubItem("InputComponents", "mycheckboxes", "ABMCheckBox", "mdi-action-list", "../mycheckboxes/mycheckboxes.html")
page.NavigationBar.AddSideBarSubItem("InputComponents", "myslider", "ABMSlider", "mdi-action-list", "../myslider/myslider.html")
page.NavigationBar.AddSideBarSubItem("InputComponents", "myrange", "ABMRange", "mdi-action-list", "../myrange/myrange.html")
page.NavigationBar.AddSideBarSubItem("InputComponents", "mycombo", "ABMCombo", "mdi-action-list", "../mycombo/mycombo.html")
page.NavigationBar.AddSideBarSubItem("InputComponents", "myeditor", "ABMEditor", "mdi-action-list", "../myeditor/myeditor.html")
page.NavigationBar.AddSideBarSubItem("InputComponents", "myradiogroup", "ABMRadioGroup", "mdi-action-list", "../myradiogroup/myradiogroup.html")
page.NavigationBar.AddSideBarSubItem("InputComponents", "myimageslider", "ABMImageSlider", "mdi-action-list", "../myimageslider/myimageslider.html")
page.NavigationBar.AddSideBarSubItem("InputComponents", "mypatternlock", "ABMPatternLock", "mdi-action-list", "../mypatternlock/mypatternlock.html")
page.NavigationBar.AddSideBarSubItem("InputComponents", "myinput", "ABMFileInput", "mdi-action-list", "../myinput/myinput.html")
page.NavigationBar.AddSideBarSubItem("InputComponents", "mysignaturepad", "ABMSignaturePad", "mdi-action-list", "../mysignaturepad/mysignaturepad.html")
page.NavigationBar.AddSideBarDivider("")
page.NavigationBar.AddSideBarItem("ContactUs", "Contact Us", "mdi-content-mail", "../frmContactUs/frmContactUs.html")
page.NavigationBar.AddSideBarDivider("")
page.NavigationBar.AddSideBarItem("DisplayComponents", "Display Components", "mdi-image-looks-6", "")
page.NavigationBar.AddSideBarSubItem("DisplayComponents", "mylabels", "ABMLabel", "mdi-action-list", "../mylabels/mylabels.html")
page.NavigationBar.AddSideBarSubItem("DisplayComponents", "mycards", "ABMCard", "mdi-action-list", "../mycards/mycards.html")
page.NavigationBar.AddSideBarSubItem("DisplayComponents", "mychips", "ABMChip", "mdi-action-list", "../mychips/mychips.html")
page.NavigationBar.AddSideBarSubItem("DisplayComponents", "mydividers", "ABMDivider", "mdi-action-list", "../mydividers/mydividers.html")
page.NavigationBar.AddSideBarSubItem("DisplayComponents", "mypagination", "ABMPagination", "mdi-action-list", "../mypagination/mypagination.html")
page.NavigationBar.AddSideBarSubItem("DisplayComponents", "mypdfviewer", "ABMPDFViewer", "mdi-action-list", "../mypdfviewer/mypdfviewer.html")
page.NavigationBar.AddSideBarSubItem("DisplayComponents", "myaudioplayer", "ABMAudioPlayer", "mdi-action-list", "../myaudioplayer/myaudioplayer.html")
page.NavigationBar.AddSideBarSubItem("DisplayComponents", "myparallax", "ABMParallax", "mdi-action-list", "../myparallax/myparallax.html")
page.NavigationBar.AddSideBarSubItem("DisplayComponents", "myimages", "ABMImage", "mdi-action-list", "../myimages/myimages.html")
page.NavigationBar.AddSideBarSubItem("DisplayComponents", "myflexwall", "ABMFlexWall", "mdi-action-list", "../myflexwall/myflexwall.html")
page.NavigationBar.AddSideBarSubItem("DisplayComponents", "myvideos", "ABMVideo", "mdi-action-list", "../myvideos/myvideos.html")
page.NavigationBar.AddSideBarSubItem("DisplayComponents", "myicons", "ABMIcons", "mdi-action-list", "../myicons/myicons.html")
page.NavigationBar.AddSideBarSubItem("DisplayComponents", "mytabs", "ABMTabs", "mdi-action-list", "../mytabs/mytabs.html")
page.NavigationBar.AddSideBarDivider("")
page.NavigationBar.AddSideBarItem("Files", "Files", "mdi-communication-live-help", "")
page.NavigationBar.AddSideBarSubItem("Files", "myupload", "ABMUpload", "mdi-action-list", "../myupload/myupload.html")
page.NavigationBar.AddSideBarDivider("")
page.NavigationBar.AddSideBarItem("SocialMedia", "Social Media", "mdi-action-perm-camera-mic", "")
page.NavigationBar.AddSideBarSubItem("SocialMedia", "mysocialshare", "ABMSocialShare", "mdi-action-list", "../mysocialshare/mysocialshare.html")
page.NavigationBar.AddSideBarSubItem("SocialMedia", "mysocialoath", "SocialOAuth", "mdi-action-list", "../mysocialoath/mysocialoath.html")
page.NavigationBar.AddSideBarDivider("")
page.NavigationBar.AddSideBarItem("Dates", "Dates", "fa fa-list-alt", "")
page.NavigationBar.AddSideBarSubItem("Dates", "mytimeline", "ABMTimeLine", "mdi-action-list", "../mytimeline/mytimeline.html")
page.NavigationBar.AddSideBarSubItem("Dates", "mycalendar", "ABMCalendar", "mdi-action-list", "../mycalendar/mycalendar.html")
page.NavigationBar.AddSideBarSubItem("Dates", "datescroll", "ABMDateScroller", "mdi-action-list", "../datescroll/datescroll.html")
page.NavigationBar.AddSideBarSubItem("Dates", "datepicker", "ABMDatePicker", "mdi-action-list", "../datepicker/datepicker.html")
page.NavigationBar.AddSideBarDivider("")
page.NavigationBar.AddSideBarItem("Register", "Register", "mdi-action-history", "../frmRegister/frmRegister.html")
page.NavigationBar.AddSideBarDivider("")
page.NavigationBar.AddSideBarItem("OtherInputs", "Other Inputs", "mdi-action-get-app", "../frmOther/frmOther.html")
page.NavigationBar.AddSideBarDivider("")
page.NavigationBar.AddSideBarItem("ListView", "List View", "mdi-action-shop", "../mylist/mylist.html")

This in essence makes our navigation bar flexible. Now to work on the code to automatically update the linkages between the navigation bar component to the pages...

The output by the way of my navigation bar should be more or less...

Figure 2

ABMNavigationBar.png
 

Mashiane

Expert
Licensed User
Longtime User
MyMaterial.Show: What's New (First Post as updated source code)

1. Action Button has received a combobox to select your images.
2. The SlideImage has received a second tab to configure the images
3. The FlexWall has received a second tab to configure the images.
4. Fixed a bug with link to images for the FlexWall.
5. The Tabs are now working yet as I have not designed a Container Designer yet however the code for it can be generated. This is coming soon.
6. The navigation bar is always created static therefore not in ConnectPage method. You can do that yourself.

FlexWalls New Design
myflexwall.flexing.png

myflexwall.flexing1.png


SlideImages Designs

myimageslider.sld.png

myimageslider.sld1.png
 

Gabino A. de la Gala

Active Member
Licensed User
Longtime User
¿Podrá ser posible que falte la carpeta "Files" en el .zip del primer post?.

Al abrir el .b4j sale un mensaje advirtiendo de la falta de un montón de ficheros .png, .bas, etc.
 

Mashiane

Expert
Licensed User
Longtime User
Not wanting to be ignorant, do you mind english please? Thanks...
Ok, found imtranslator.net.... this is what I get

Will it be able to be possible that the folder ' Fields ' is absent in the .zip of the first post?.

On having opened .b4j, salt a message warning of the absence of a heap of files .png, .bas, etc.


He acabo de comprobar, tienes razón. Accidente ahí. Va a arreglar pronto. Muchas gracias
 

Gabino A. de la Gala

Active Member
Licensed User
Longtime User
I'm sorry I posted earlier in Spanish.

It was a mistake to make the copy and paste as it seems to copy the part of Spanish instead of the already translated into English.

Thank you very much for having taken the trouble to translate it yourself.

A greeting.
 

Mashiane

Expert
Licensed User
Longtime User
MyMaterial.Show : What's New: ABMTable

Anyway I have been playing around with the ABMTable, still feels like a challenge but hopefully can manage it soon. I just to want to reach my confort zone with it.

Figure 1
mytable.tbl1.png


This went well to generate code that resulted in the following

Figure 2
mytable.tbl1sc.png


With a disply of this one..

Figure 3
TableDisplay.png


Each of the columns is defined separately by specifying each attribute, as displayed below..

FirstName
column_firstname.png


Last Name

column_lastname.png


Columns Open
column_open.png


and Column ID

column_id.png


As noted, this just creates the code to define the table and there is no data added to the table. I still have to explore some more about adding rows, the open, edit, delete functionality too. At least the purpose of the tool when it comes to this component is achieved.
 

Mashiane

Expert
Licensed User
Longtime User
MyMaterial.Show: Other Labels

The ABMShared module has other methods to build some other components too, like headings, paragraphs, sub headers etc. I have also adopted this approach for other labels that one can create, from just selecting a label type from a dropbox and then specifying the details.

These are in Components 3 > ABMLabel Other

B4X:
page.Cell(1,1).AddComponent(ABMShared.BuildHeader(page, "par352", "Introduction"))

B4X:
page.Cell(1,1).AddComponent(ABMShared.BuildParagraph(page, "ABMLabelOther353", "Take a look at this section to quickly understand how grids work! Make sure you have read the Themes topic first. We use themes when we design a grid. {B}It is very important you grab the concept of the Grid and Cells before proceeding with the next chapters!{/B}"))

B4X:
page.Cell(1,1).AddComponent(ABMShared.BuildSubHeader(page, "par354", "12 Cells"))
 

Attachments

  • BuildHeader.png
    BuildHeader.png
    15 KB · Views: 260
  • BuildParagraph.png
    BuildParagraph.png
    24.2 KB · Views: 269
  • BuildSubHeader.png
    BuildSubHeader.png
    15.2 KB · Views: 254

micro

Well-Known Member
Licensed User
Longtime User
Hi Mashiane
some time ago i did some tests with ABMaterial and worked well, now i'm trying your RAD.
I added a simple page without any component, but when building applcation an error occurs, see attached image.
if I build and compile your MyMaterial.db work fine.
Where I can be wrong?
Thanks
 

Attachments

  • Cattura.PNG
    Cattura.PNG
    73.6 KB · Views: 248

Mashiane

Expert
Licensed User
Longtime User
Hi Mashiane
some time ago i did some tests with ABMaterial and worked well, now i'm trying your RAD.
I added a simple page without any component, but when building applcation an error occurs, see attached image.
if I build and compile your MyMaterial.db work fine.
Where I can be wrong?
Thanks
Hi @micro , thanks for showing interest in MyMaterial.Show

Whilst the Build Menu is part of MyMaterial.Show, at the moment there are some things that are not fully functional about it. It was a test of concept and it's not complete because I also experienced some buggy issues about it. For example, you need to stop all "java" processes in the task manager of windows.

In the mean time, please do the following

1. When finished creating your pages and components (or no components) for your MyMaterial project
2. You need to Compile your Project using Project > Compile (this will create your b4j project files and relevant pages and open the created b4j project. All pages, components to be created should be "active" and have a tab-order i.e. order of appearance.
3. After your project is oped in b4j, run the project in "Release" mode.
4. The http page would have been opened on the web browser after MyMaterial > Project > Compile. Refresh it, your created project should be opening.

As you will note in all of my posts, I have not fully discussed the "Build Menu", as soon as I crack some things about it, all will be availabled.

Yes, I have noted the table non-inclusion, I'm not done yet with it and will be poising soon. Thanks for the reminder.

PS: I am also running an experiment about my ABMaterial experiences..
 

Mashiane

Expert
Licensed User
Longtime User
MyMaterial.Show: Other Labels

The ABMShared module has other methods to build some other components too, like headings, paragraphs, sub headers etc. I have also adopted this approach for other labels that one can create, from just selecting a label type from a dropbox and then specifying the details.

These are in Components 3 > ABMLabel Other

B4X:
page.Cell(1,1).AddComponent(ABMShared.BuildHeader(page, "par352", "Introduction"))

B4X:
page.Cell(1,1).AddComponent(ABMShared.BuildParagraph(page, "ABMLabelOther353", "Take a look at this section to quickly understand how grids work! Make sure you have read the Themes topic first. We use themes when we design a grid. {B}It is very important you grab the concept of the Grid and Cells before proceeding with the next chapters!{/B}"))

B4X:
page.Cell(1,1).AddComponent(ABMShared.BuildSubHeader(page, "par354", "12 Cells"))
I've added the BuildCodeBlock and BuildCodeBlockFromSmartString as part of this code generator. Will be posting the update soon...
 
Top