There are two tasks required in order to build the user interface with Designer4android:
- Build the the interface with Designer4android tool.
- Integrate the design in your Java project.
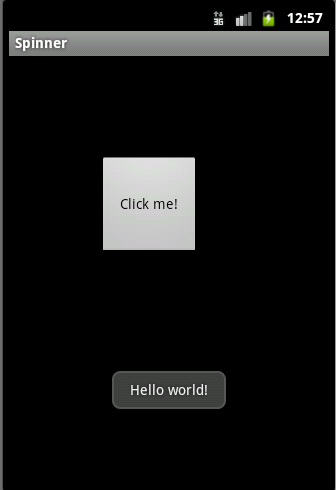
In this simple program we will create a layout made of a single button. Clicking on the button will show a toast message.
When you start D4A tool you will see two forms: The properties grid / script window and the abstract designer:
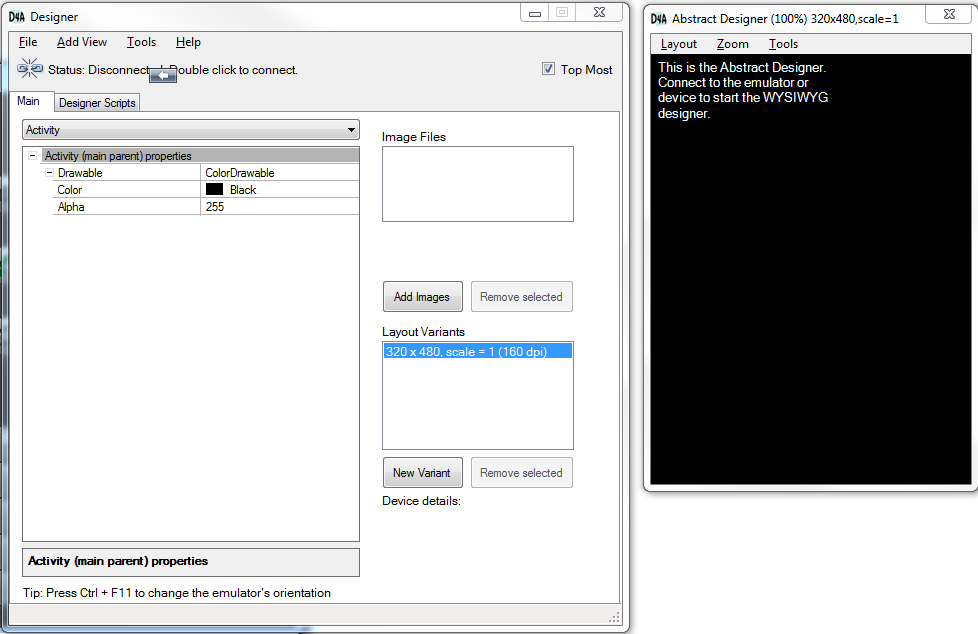
The layout is visualized on a connected emulator or connected device.
Double click on the "status" message to connect D4A to the emulator or device. After a few seconds you should see a black screen.
Add a button by selecting Add View menu -> Button.
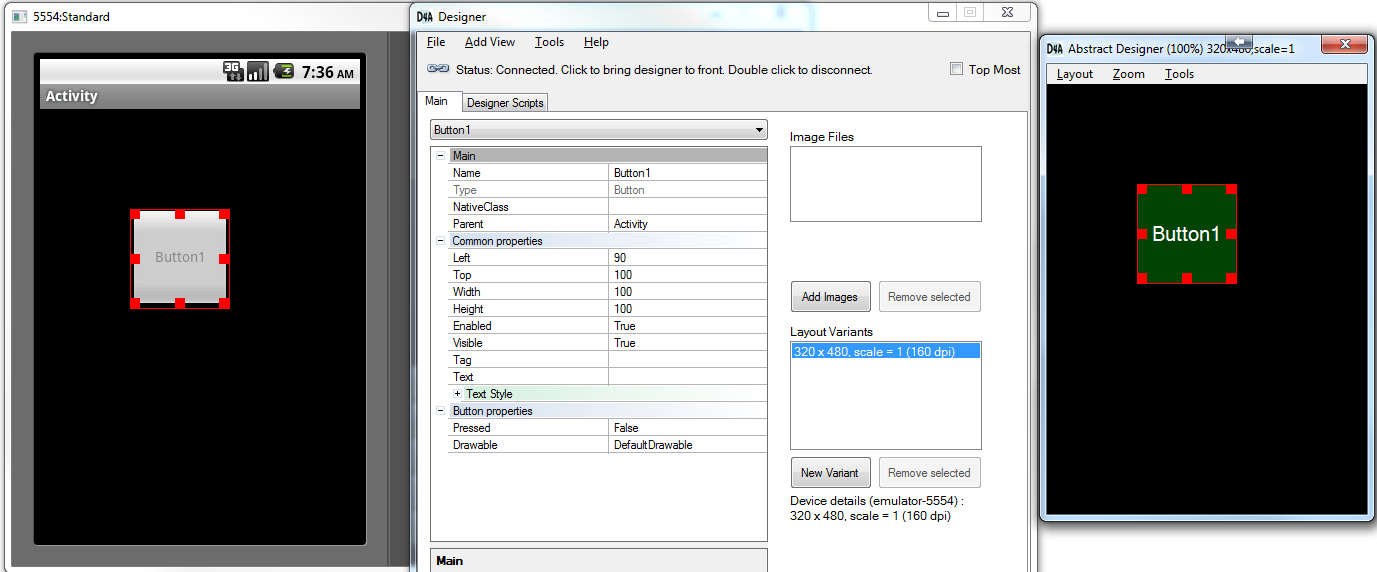
The WYSIWYG designer shows the view's name if no text is yet assigned. Change the Button's text to Click me.
Save the layout file. The layout file should be saved in your project assets folder. We will name our file Layout1. Note that Android file system is case sensitive.
Synchronization - If you are using Eclipse 3.7 or higher version then you can set Eclipse to automatically update the resources. This is done by checking Preferences - Workspace - Refresh on access. On previous versions or if Eclipse doesn't show a newly added file you will need to right click on the project and choose Refresh.
Java integration
As written in the configuration tutorial you should add Designer4android.jar to your project libs folder.
The program code is:
In the manifest file you should declare that all screens are supported:
We create a new object of type Designer4android. The constructor expects a single argument which is the name of the layout file (case sensitive!).
We then call loadLayout to load the layout.
This method returns a ViewGroup which is the parent of all the layout views. The views are not created immediately. After the ViewGroup is added to the activity the views will be created (during the onMeasure call).
Designer4android.loadLayout expects two arguments:
- Activity which is required for the views context.
- OnLayoutLoadedListener - an optional listener that is called after the views are created. In this example our activity implements this interface.
We first check whether there were any errors. This is useful for debugging.
Then we can access the views by their names by calling Designer4android.getView.
Time to run our program")
Note that you can load multiple layout files and also load layouts and add them to other ViewGroups.
- Build the the interface with Designer4android tool.
- Integrate the design in your Java project.
In this simple program we will create a layout made of a single button. Clicking on the button will show a toast message.
When you start D4A tool you will see two forms: The properties grid / script window and the abstract designer:
The layout is visualized on a connected emulator or connected device.
Double click on the "status" message to connect D4A to the emulator or device. After a few seconds you should see a black screen.
Add a button by selecting Add View menu -> Button.
The WYSIWYG designer shows the view's name if no text is yet assigned. Change the Button's text to Click me.
Save the layout file. The layout file should be saved in your project assets folder. We will name our file Layout1. Note that Android file system is case sensitive.
Synchronization - If you are using Eclipse 3.7 or higher version then you can set Eclipse to automatically update the resources. This is done by checking Preferences - Workspace - Refresh on access. On previous versions or if Eclipse doesn't show a newly added file you will need to right click on the project and choose Refresh.
Java integration
As written in the configuration tutorial you should add Designer4android.jar to your project libs folder.
The program code is:
B4X:
import android.app.Activity;
import android.os.Bundle;
import android.util.Log;
import android.view.View;
import android.view.View.OnClickListener;
import android.view.ViewGroup;
import android.widget.Button;
import android.widget.Toast;
import anywheresoftware.d4a.Designer4android;
import anywheresoftware.d4a.OnLayoutLoadedListener;

public class Test1Activity extends Activity implements OnLayoutLoadedListener{
   @Override
   public void onCreate(Bundle savedInstanceState) {
      super.onCreate(savedInstanceState);
      Designer4android d4a = new Designer4android("Layout1");
      ViewGroup vg = d4a.loadLayout(this, this);
      setContentView(vg);
   }

   public void onLayoutLoaded(Designer4android d4a, boolean success, Exception e) {
      if (!success) {
         Log.e("MyTag", "Error loading layout file", e);
         finish(); //close the activity
         return;
      }
      final Button button1 = (Button)d4a.getView("Button1");
      button1.setOnClickListener(new OnClickListener() {

         public void onClick(View arg0) {
            Toast.makeText(button1.getContext(), "Hello world!", Toast.LENGTH_LONG).show();
         }
      });
   }
}
In the manifest file you should declare that all screens are supported:
B4X:
<supports-screens android:largeScreens="true"
       android:normalScreens="true"
       android:smallScreens="true"
       android:anyDensity="true"/>
We create a new object of type Designer4android. The constructor expects a single argument which is the name of the layout file (case sensitive!).
We then call loadLayout to load the layout.
This method returns a ViewGroup which is the parent of all the layout views. The views are not created immediately. After the ViewGroup is added to the activity the views will be created (during the onMeasure call).
Designer4android.loadLayout expects two arguments:
- Activity which is required for the views context.
- OnLayoutLoadedListener - an optional listener that is called after the views are created. In this example our activity implements this interface.
We first check whether there were any errors. This is useful for debugging.
Then we can access the views by their names by calling Designer4android.getView.
Time to run our program
Note that you can load multiple layout files and also load layouts and add them to other ViewGroups.