For security reasons GCP will not allow plain old FTP access to their servers. But, they do offer a nice alternative to copying files from your desktop and onto your VM. It’s a bit like using Google Drive with some differences.
To copy files from your desktop onto your VM requires that you first copy the files to a bucket. A ‘bucket’ is a non-intuitive way to describe a folder. Once the file/s are in the bucket then it can be copied onto your VM. We’ll go through the process now of creating a bucket, copying files to it and the copying the files across to your VM.
Creating the bucket
")
To copy files from your desktop onto your VM requires that you first copy the files to a bucket. A ‘bucket’ is a non-intuitive way to describe a folder. Once the file/s are in the bucket then it can be copied onto your VM. We’ll go through the process now of creating a bucket, copying files to it and the copying the files across to your VM.
Creating the bucket
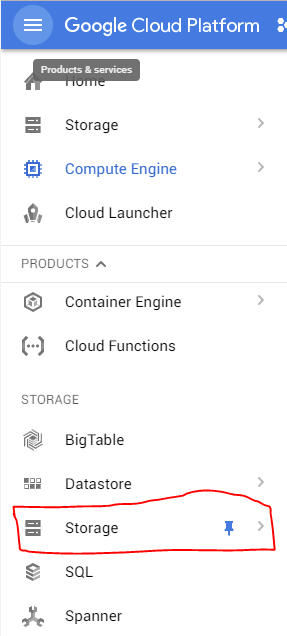
- Click on the ‘hamburger’ menu in the top-left of the browser (as shown below) to open up the available menu options.
Scroll down until you find the ‘Storage’ option and click it.
Note: the blue push-pin is a way to pin the menu to the top of the menu list. You can see that I’ve opted to have the Storage menu pinned to the top of the list along with some other menus that I commonly use.
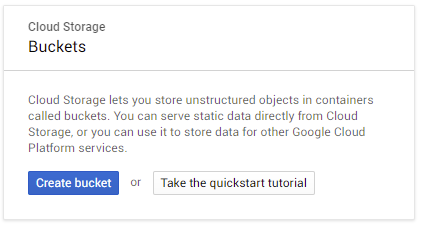
- You should now be in the ‘Browser’ page of the Storage section. In the middle of the screen you will see a dialog with a blue button labelled ‘Create bucket’, click the button.
- Now, you’re being asked for the name of the bucket you want to create. The name MUST be globally unique. This means that the name cannot be in use by anyone else on the planet. There’s a good chance that someone has already taken the commonly used names. GCP will check that the name is unique before allowing you to create a button.
- The Default Storage Class is how you plan to use the file/s that are to be stored in the bucket. For our purposes, we can leave it as the default for simplicity. However, if you do plan to use this bucket for other purposes then read through each option and choose appropriately.
- Multi-Regional location
My VM is located in the US so I’m leaving the default that has come up as ‘United States’. You might need to choose ‘Asia’ or ‘Europe’ depending on where you decided to host your VM.
- Click the Create button and a new bucket will be created for you
- You should now see that the Browser page has changed to something like the below
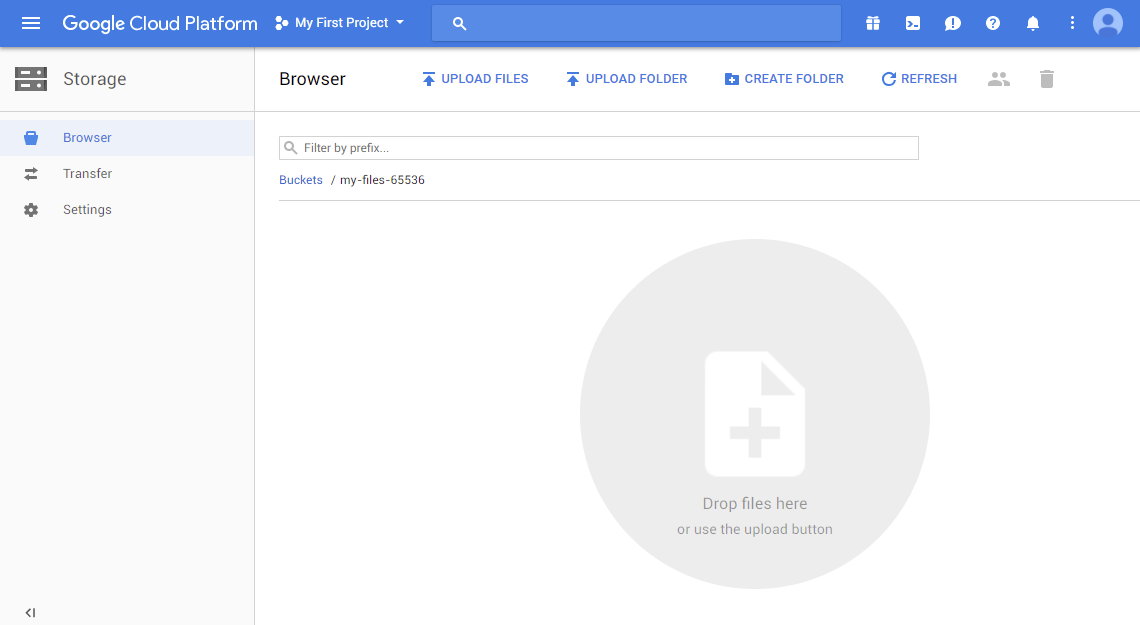
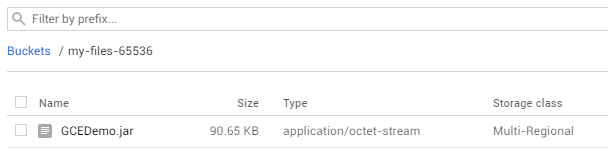
- This couldn’t be easier! Drag and Drop the files you want copied onto your VM into your bucket. After it’s done you should have at least one file in the bucket - like below
- Great! Now how the heck do we get it from the bucket onto our VM?
It’s not at all obvious and took me,... well let’s just say that it me a while and leave it at that.
Now you should have at least one file in the bucket. Now we’re going to copy the file across to the VM. This does involve a couple of steps.
- For now, we’re just going to keep everything in the home folder on the VM.
What do you mean you don’t have a home folder? Of course you do!
In your VM console (you know the one you opened in a browser) type ‘pwd’ at the command prompt and press Enter.
Crazy! You should see something like ‘/home/my-cool-noob-name’ be displayed on screen. ‘pwd’ is the command to use to find out what directory you are currently in.
It makes sense to keep the programs etc. that you want to install inside your home directory. But, it also makes sense to organise the programs into their own directories.
Note: if you ever forget where your home directory is you can always use the tilde ‘~’ in the cd command. ‘~’ is the shortcut for the home directory. As an example of using the cd command is shown below
cd ~
- Create a new directory in your home folder for your app.
This is done simply by typing the following at the command line and pressing Enter. Don’t forget to replace ‘my-super-app’ with a name that you want to use.
mkdir my-super-app
mkdir - is the Linux command to make a directory. Check that it is there by typing in the following command and press Enter
ls
(that’s a lowercase L and S) ls - this is used to see what’s inside the directory. It has a lot more options available but for now we’ll be keeping it simple for now.
- Now we want to change into the newly created directory. We do this by typing in the following command and pressing Enter - again, don’t forget to change ‘my-super-app’ to the name you used above.
cd my-super-app
cd - is used to change to a directory. Let’s be sure that you are now in the directory type ‘pwd’ again and press Enter. The path shown should now include the newly created directory.
- Now we need to flip black to the bucket where our file/s are. On the right hand side of the screen there is a menu button (like the shown below) - make sure that the browser window is wide enough otherwise it might be hidden from view.
We need to choose the ‘Copy’ option.
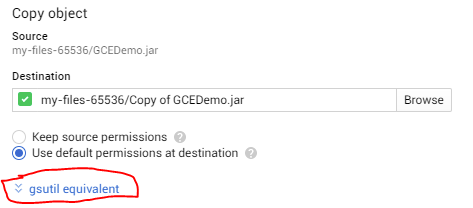
- A new page is shown with some options.
The first thing you need to do is make sure that the ‘Use default permissions at destination’ is selected (as shown below - not the circled part - the radio button above it)
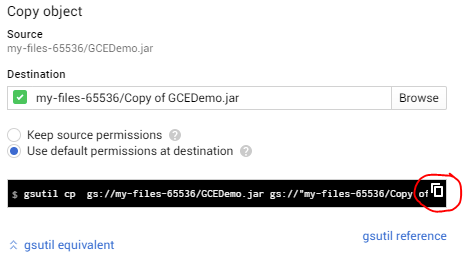
- Next, click on the link I’ve carefully circled in the above image. This will expand to show you something similar like that in the below image
What you’re looking at here is the command to run at the command line in your VM console. This command will make a copy the file back into the bucket - not quite what we want but read on!. The little square things I’ve circled will copy the command into your clipboard - click the square things now.
- Back in the console of your VM paste the content of your clipboard BUT DO NOT PRESS ENTER … yet.
If you look at the command that is now sitting on the command line it will look a bit like the below
gsutil cp gs://my-files-65536/GCEDemo.jar gs://"my-files-65536/Copy of GCEDemo.jar"
Upon closer inspection this command will make a copy of the file and put the copy back into the bucket. Ie. the source and destination locations are the same, only the filename is different. We need to change the destination of where we want our copy to go. Below is the command again but I’ve highlighted the text (in what barely passes as the colour orange) that needs to be taken out
gsutil cp gs://my-files-65536/GCEDemo.jar gs://"my-files-65536/Copy of GCEDemo.jar"
Backspace that orange highlighted part out and replace it with this ‘.’ (that’s a dot, fullstop, period, whatever you like to call it but without the single quotes. Your new command should look something like this now
gsutil cp gs://my-files-65536/GCEDemo.jar .
NOW you can press Enter.
- You will see some text displayed about the copy process and then you’re back at the prompt.
Check that the file is now in your directory by issuing that ‘ls’ command again and press Enter.
Excellent!

Attachments
Last edited: