As promised .....SlimLine Menu code
Well, it is time to speak of code.
The first attention has been to get a light code and i think that is so.
Anyway take note that some parts of the code have been chosen for further development of the program.
To start to comment the code, please note that SlimLine is fully created by code but there is also an item for which i used the designer.
The "main" layout has been created to enable the AutoScaleAll scripts to handle the dimensions and text of the dynamic object and so to reduce the problems to apply it to a different dimension of display
Into the "main" file .bal you will find only a label 8dipx100dip with property Visible = False and TextSize = 12.
This label has been sent to Back under the dynamic object that will be created.
The project has been developeded as 320x480 160dpi
You will need to add a similar label to your layout if you wish to add SlimLine Menu to your program.
To comment the code we can start from Global section.
Sub Globals
Private Lbl1 As Label 'The label created with Designer
Dim Mlist(5)
Dim Li(7)
Dim Labelio As Label
Dim Pan2 As Panel
Dim ChoLab As Label
Dim Labmen As Label
Dim PanMen As Panel
Dim VM As Boolean
Dim No(7) As Int
Dim x, MeNo, t, KY, k, D As Int
Dim LG As String
Dim Lista, Nlist As String
Dim Tx, LL As Int
Dim qq, BV, LN As Int
Private Label1 As Label ') You do not need of these labels
Private Label2 As Label ') used only by the Trial program
End Sub
You can note that the program use only 2 panels and 3 labels
To be true 1 panel could be substituted with a simple (dynamic) label being only the frame of the menu. (but i used panel for further development as i said)
The variables used are relatively few. The only boolean variable VM is the flag that informs if a menu is visible or not.
Going over we find
Sub Activity_Create(FirstTime As Boolean)
'Do not forget to load the layout file created with the visual designer. For example:
'Activity.LoadLayout("Layout1")
Activity.LoadLayout("main")
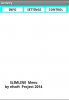
MeNo = 3
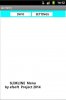
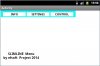
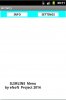
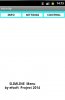
Mlist(0) = "INFO,SETTINGS,CONTROL,"
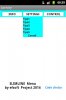
Mlist(1) = "Elemento1,Elemento2,Elemento3,Elemento4, Cancel,"
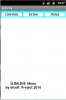
Mlist(2) = "Tipo1,Tipo2,Tipo3,Tipo4,Tipo5, Cancel,"
Mlist(3) = "Prova1,Prova2,Prova3,Prova4, Cancel,"
For n = 1 To MeNo
For h = 1 To Mlist(n).Length '(to calculate number of items of the Mlist(n))
If Mlist(n).CharAt(h-1) = "," Then No(n) = No(n) + 1
Next
Next
D = 2*Lbl1.Height
VM = False
CreaBase
End Sub
The above sub is the most important routine as is the one that enable the user to give to the object your own parameters.
this happens using the following lines:
MeNo = 3
Mlist(0) = "INFO,SETTINGS,CONTROL,"
Mlist(1) = "Elemento1,Elemento2,Elemento3,Elemento4,"
Mlist(2) = "Tipo1,Tipo2,Tipo3,Tipo4,Tipo5,"
Mlist(3) = "Prova1,Prova2,Prova3,Prova4,"
With MeNo (Menu Number) you can modify the number of the menus used.(1,2 or 3)
Mlist(0) = contains the titles of the lists
Mlist( 1, 2 and 3) user can add here the actions available for selection in the lists
you will note the variable D that represents the standard height of a single line of the menu.
The value established by the use of Lbl1.Heigh .is due to what i wrote above
The last instruction calls the Sub CreaBase that is the following:
Sub CreaBase
Pan2.Initialize("Panel")
Pan2.Color=Colors.Cyan
Activity.AddView(Pan2,Lbl1.Height/4, 0, 3*Lbl1.Width+2*Lbl1.Height, 4*Lbl1.Height)
Pan2.SendToBack
Pan2.Enabled = False
CreaLio
End Sub
The previous sub with its last line of code calls Crealio sub that is one of the 3 most important sub of my program,
Sub CreaLio
Lista = Mlist(0)
For x = 1 To MeNo
Dim Lio As Label
Lio.Initialize("Labelio")
Lio.Visible = True
Lio.Color = Colors.White
Lio.TextColor = Colors.Black
Lio.TextSize = Lbl1.TextSize+2
Lio.Typeface = Typeface.DEFAULT_BOLD
Lio.Gravity = Gravity.CENTER_VERTICAL 'BOTTOM
Lio.Gravity = Gravity.CENTER_HORIZONTAL
Select Case True
Case MeNo = 1
Activity.AddView(Lio, Lbl1.Width+10dip, Lbl1.Height, Lbl1.Width, (5*Lbl1.Height/2))
Lio.Tag = x
Case MeNo = 2
Activity.AddView(Lio, (Lbl1.Width/2) + (x-1) * (Lbl1.Width + 5dip), Lbl1.Height, Lbl1.Width, (5*Lbl1.Height/2))
Lio.Tag = x
Case MeNo = 3
Activity.AddView(Lio, (3*Lbl1.Height/2) + (x-1) * (Lbl1.Width), Lbl1.Height, Lbl1.Width-5Dip ,(5*Lbl1.Height/2))
Lio.Tag = x
End Select
Tx = (Lista).IndexOf(",")
Lio.text = Lista.SubString2(0, Tx)
Nlist = Lista.SubString2(Tx+1, Lista.Length) '(remaining Lista string)
Lista = Nlist
Next
End Sub
Looking at the code, in CreaLio Sub, you find the usual code to create a list of label (now in horizontal way) and a routine to select how many menues the user wishes and, consequently how to create them and their position.
done the above the routine load the titles concerning the created menues.
Below the CreaLio code there is the Sub of the connected event Sub LabeLio Click
Sub Labelio_Click
If VM = True Then Return
Dim Lio As Label
Lio.Initialize("Labelio")
Lio = Sender
k = Lio.Tag
LL = Lio.Left
Creamenu
End Sub
These few lines of code check if a menu is active using the state of boolen variable VM.
Then gets from the sender the Tag value to identify the Label called and store in LL the left position od the same label to align the selected menu that will be created.
After this we are ready to create and populate the selected menu with the sub Creamenu
Sub Creamenu
Lista = Mlist(k)
qq = Activity.NumberOfViews : BV = qq
For x = 1 To No(k)
Dim L1 As Label
L1.Initialize("Labmen")
L1.Visible = True
L1.Color = Colors.Cyan 'White 'Transparent
L1.TextColor = Colors.Black
L1.Typeface = Typeface.DEFAULT_BOLD
L1.Gravity = Gravity.CENTER_HORIZONTAL
L1.Gravity = Gravity.CENTER_VERTICAL
L1.TextSize = Lbl1.TextSize
Activity.AddView(L1, LL, (Lbl1.Height*2) + x*(Lbl1.Height*2), Lbl1.Width-5Dip, (Lbl1.Height*2))
Tx = (Lista).IndexOf(",")
LG = Lista.SubString2(0, Tx)
Nlist = Lista.SubString2(Tx+1, Lista.Length) '(remaining Lista string)
Lista = Nlist
L1.Text = LG : Li(x) = LG
Next
Dim Pan1 As Panel
Pan1.Initialize("PanMen")
Pan1.Enabled = True
Pan1.Visible = True
Pan1.Color = Colors.Transparent
Pan1.BringToFront
Activity.AddView(Pan1,LL, 4*Lbl1.Height, Lbl1.Width-5Dip, (2*Lbl1.Height) * No(k))
VM = True
End Sub
The sub connects the content of each menu (Wlist() string of the array) to the tag obtained from the label Title.
Below you find the following line: qq = Activity.NumberOfViews : BV = qq
This code fixes the number of Views active before creating the required menu, allowing so to correctly cancel the Menu items when required.
The remaining code will create the menu list adding single labels for each line of the items added by the user (actually 5 item max).
The final code of the Sub creates a transparent panel over the menu list that will help to select an item of the list..
Sub PanMen_Touch (Action As Int, O As Float, V As Float)
If Action = Activity.ACTION_DOWN Then
KY = Round(V)
End If
Select Case True
Case KY < (D*1) : t = 1
Case KY < (D*2) : t = 2
Case KY < (D*3) : t = 3
Case KY < (D*4) : t = 4
Case KY < (D*5) : t = 5
Case KY < (D*6) : t = 6
End Select
ClearList
Dim SelLab As Label
SelLab.Initialize("ChoLab")
SelLab.Color = Colors.White
SelLab.Textcolor = Colors.Red
SelLab.TextSize = Lbl1.TextSize
SelLab.Typeface = Typeface.DEFAULT_BOLD
SelLab.Gravity = Gravity.CENTER_HORIZONTAL
SelLab.Gravity = Gravity.CENTER_VERTICAL
SelLab.BringToFront
SelLab.Visible = True
Activity.AddView(SelLab,LL, Lbl1.Height, Lbl1.Width-5dip, (5*Lbl1.Height/2))
SelLab.Text = Li(t) : Lbl1.Text = k & t 'The Code choice can be read here during the real use
If SelLab.Text = " Cancel" Then
ChoLab_Click
Lbl1.Text = ""
End If
Label2.Text = "Code choice " & Lbl1.Text 'Instruction needed in trial version only
End Sub
The third important Sub allows to transform a touch on the panel in the equivalent value (t) to identify the item clicked.
At this point, instead of to use code like MenuTitle.Text = SelectItem.Text that is quite difficult to apply to objects not indexed a new dinamic label showing the text clicked, created ad hoc, will be sent to overwrite the title in the label emulating so the above mentioned instruction.
Sub ChoLab_Click
qq = Activity.NumberOfViews : LN = qq-1
ClearList
VM = False
Lbl1.Text = ""
Label2.Text = "" 'Instruction needed in trial version only
End Sub
The Sub requires an event Click but can be also called by code to automatize the operation.
The last Sub is easy to understand that is the code that using the state of the active views executes the cancellation of the menu list on the selection of an item,
Sub ClearList
qq = Activity.NumberOfViews : LN = qq-1
For m = LN To BV Step -1
Activity.RemoveViewAt(m)
Next
End Sub
And this is all.
Find attached the zip files with the trial code to use with B4A. I suggest you to use an emulator 320x480 160dip (the script applied is not optimized for the moment)