AndEngine is a set of libraries, made by Nicolas Gramlich, made to program 2D videogames for android devices through the OpenGL ES 2.0 technology. It is easy to use, has multiple features and is open source!
I. Introduction
These past few days I have been working on a port of one of the most popular and powerful game engines for Android. AndEngine.
My port, RSAndEngine (RootSoft AndEngine) wraps this library and makes tons of methods available to the B4A platform,
which makes Basic4Android even more powerful then it was before.
Making games with or without Basic4Android has never been easier!
II. Architecture
Let me explain how the AndEngine Game is connected with Basic4Android:
1. B4A Activity ----------> 2. B4A GameService <----------> 3. AE Game Activity
The only purpose of the B4A activity is used to start the GameService. After it has started, it can be closed.
The GameService is used to do the communication between the AndEngine GameActivity and Basic4Android.
Events raised from AE will be send to GameService.
AndEngine (AE) Activity is an external activity in the library itself. The only way you have control over it is using the available B4A methods.
III. Manifest
Before you start creating your first game, you need to edit the manifest file:
Go to Project -> Manifest Editor and add the following lines:
B4X:
SetApplicationAttribute(android:name, "com.rootsoft.rsandengine.RSOverlayApplication")

'Add if you want SimpleBaseGameActivity
AddApplicationText(<activity android:name="com.rootsoft.rsandengine.RSSimpleBaseGameActivity"/>)

'Add if you want BaseGameActivity
AddApplicationText(<activity
   android:name="com.rootsoft.rsandengine.RSBaseGameActivity"/>
   android:configchanges="keyboard|keyboardHidden|orientation|screenLayout|uiMode|screenSize|smallestScreenSize"
   android:screenOrientation="landscape")
IV. Loading of the Engine
B4X:
'Loads the AndEngine
Sub LoadEngine

   'First we need a Camera Object
   'A Camera object is seen as the view of the game. This will define what you see in game on your screen.
   Camera.Initialize(0, 0, CAMERA_WIDTH, CAMERA_HEIGHT)

   'Now we initialize the Engine Options needed for the Engine.
   EngineOptions.Initialize(True, True, EngineOptions.LANDSCAPE_FIXED, Camera)
   EngineOptions.NeedMusic = True 'If you want to enable music in the game

   'Next we will create a scene
   'A scene is the object where we will draw on. See like a canvas
   Scene.Initialize("Scene")

   'And let's initialize the engine.
   AndEngine.Initialize("AndEngine", EngineOptions)
   AndEngine.Scene = Scene

   'Starts the game
   AndEngine.StartBaseGame

End Sub
This will basically initialize the engine. You can set a lot more of options and different objects like BoundCamera, SmoothCamera, ZoomCamera, etc.
For starting the game you can choose between:
B4X:
AndEngine.StartSimpleGame 'This will start a SimpleBaseGameActivityor
B4X:
AndEngine.StartBaseGame 'This will start a BaseGameActivityV. SimpleBaseGame vs BaseGame
Since beta version 1.01, there is an update which supports BaseGameActivity.
The difference between SimpleBaseGameActivity and BaseGameActivity is that you can determine when you continue from an event.
In SimpleBaseGameActivity, when an event is raised, it doesn't wait for the B4A Service to do it's appropriate tasks.
For example: When loading the resources, it is possible that the scene has been created already. Not that it is bad, but it's better to follow the lifecycle of the AndEngine's activity.
However with BaseGameActivity, you can determine when you want to finish the event. The BaseGameActivity will wait until you call a certain method (LoadResourcesFinished, CreateSceneFinished, ...) to continue the execution of the code. Therefore it is advised to use BaseGameActivity rather then SimpleBaseGameActivity.
You should note that the events of SimpleBaseGame are different then BaseGame!
For now, we will only cover BaseGameActivity:
B4X:
' ! --------------- ! ANDENGINE BASEGAMEACTIVITY EVENTS ! -------------- !

'The engine options are created
Sub AndEngine_EngineOptionsCreated (Options As Object)

End Sub

'Here you should load all of your sprites, backgrounds, tiles into memory.
Sub AndEngine_LoadResources

   'First we request the engine so that we can work with it.
   'Quite important to call this here.
   AndEngine.RequestEngine

    'Load your resources here


   'After the resources are loaded, we need to call this method in order to proceed. Always call this at the end of _LoadResources.
   AndEngine.LoadResourcesFinished

End Sub

'We create the scene.
'Here you have to handle all the scene stuff.
'Adding of sprites and entities should be done in _PopulateScene
Sub AndEngine_CreateScene

   'When you are done creating the scene, we need to call this method in order to proceed to _PopulateScene
   AndEngine.CreateSceneFinished(Scene)

End Sub

'Here we will populate the scene will different entities.
'This could be anything from adding enemies to our scene, adding a player, playing music, setup menu options,
'or pretty much anything else you can think of.
Sub AndEngine_PopulateScene (Scene As Object)


   'When you are done populating the scene, we need to call this method in order to proceed and let the engine run.
   AndEngine.PopulateSceneFinished

End Sub

'The GameActivity was created and started
Sub AndEngine_Started

End Sub

'The GameActivity was destroyed
Sub AndEngine_Stopped

End Sub
VI. AndScene
The Scene class is the root container for all objects to be drawn on the screen.
A Scene has a specific amount of Layers, which themselves can contain a (fixed or dynamic) amount of Entities.
You can see it like a B4A Panel.
Every scene has 2 events:
B4X:
' ! --------------- ! SCENE EVENTS ! -------------- !

Sub Scene_SceneTouched (Scene As Object, Action As Int)


End Sub

Sub Scene_AreaTouched (Action As Int, LocalX As Float, LocalY As Float)

End Sub
To make use of these events, you should call the listeners. This can simply be achieved by calling this:
B4X:
'Adds listeners to the scene
Scene.setOnSceneTouchListener
Scene.setOnAreaTouchListener
VII. AndCamera
A Camera defines the rectangle of the scene that is drawn on the screen, as not the whole scene is visible all the time. Usually there is one Camera per Scene. You can use the camera to chase your character, to zoom to specific place on the screen, and more. A Camera doesn't have any events, but there are a couple of more extended version of the camera.
- AndBoundCamera - You might specify bounds for your scene.
- AndZoomCamera - You might enable zooming, pinch zoom, and scrolling camera.
- AndSmoothCamera - An extended version of the ZoomCamera. This will zoom smoothly to the given position rather then 'hopping'
VIII. AndSprite
A sprite is an object that can be drawn. It has a position/rotation/scale/color/etc.
Making a sprite using RSAndEngine is a lot easier then doing it in eclipse. With just 3 lines of code, you can draw a sprite on the screen.
B4X:
Dim sprBackground As AndSprite 'Create
sprBackground.Initialize("sprBackground", "background.png", 0, 0, 800, 480) 'LoadResources
Scene.AttachChild(sprBackground) 'PopulateScene
Every sprite has 2 events:
To make use of the AreaTouched event, you need to register the Touch Listener to the scene.
B4X:
'Register touch listeners to the towers
Scene.RegisterTouchArea(sprBackground)
B4X:
' ! --------------- ! SPRITE EVENTS ! -------------- !

'You can check where the area is touched of the sprite
Sub sprTower_AreaTouched (Action As Int, SceneX As Float, SceneY As Float, LocalX As Float, LocalY As Float, Tag As Object)
   If Action = Constants.ACTION_UP Then
      Select Tag
         Case 0
            ToastMessageShow("Tower 1 clicked", False)
         Case 1
            ToastMessageShow("Tower 2 clicked", False)
         Case 2
            ToastMessageShow("Tower 3 clicked", False)
      End Select
   End If
End Sub

'You can do collision detection here.
Sub sprTower_ManagedUpdate (SecondsElapsed As Float)
   If Player.CollidesWith(sprTower(0)) Then
      Text.Text = "Player collided with the first tower."
   Else If Player.CollidesWith(sprTower(1)) Then
      Text.Text = "Player collided with the second tower."
   Else If Player.CollidesWith(sprTower(2)) Then
      Text.Text = "Player collided with the third tower."
   End If
End Sub
There are a 2 sub classes of AndSprite.
- AndAnimatedSprite - You may animate tiles in specified intervals.
- AndTiledSprite - entity with tiled texture, you may switch between tiles. E.g Menu buttons
AndAnimatedSprite
Since RSAndEngine V1.04, AndAnimatedSprite has been updated with a new listener.
B4X:
mPlayer.AddAnimationListener = trueWhich will raise these events:
B4X:
' ! --------------- ! ANIMATION EVENTS ! ---------------- !
Sub Player_AnimationStarted

End Sub

Sub Player_AnimationFinished

End Sub

Sub Player_AnimationFramechanged (OldFrame As Int, NewFrame As Int)

End Sub

Sub Player_AnimationLoopFinished (RemainingLoopCount As Int, InitialLoopCount As Int)


End Sub
IX. AndMusic
Playing music in RSAndEngine is extremely easy.
B4X:
Dim Music As AndMusic
Music.Initialize("MainTheme", "maintheme.mp3")
Music.Play
But first you need to make sure the engine will play music:
B4X:
EngineOptions.NeedMusic = TrueEvery music object also has a Completion event:
B4X:
Sub MainTheme_Completed

end sub
X. AndModifiers
Entity Modifiers are helpful classes that can brings some 'effects' for our entities, such as rotating, scaling, alpha changing and many more.
- AndAlphaModifier
- AndMoveModifier
- AndRotationModifier
- AndSkewModifier
- AndJumpModifier
- AndLoopEntityModifier
- AndDelayModifier
- AndScaleModifier
B4X:
Dim rotMod As AndRotationModifier
'3 Seconds from 0 degrees to 360 degrees.
rotMod.Initialize("RotationModifier", 3, 0, 360)
rotMod.addModifierListener
Player.registerEntityModifier(rotMod)
You can use an AndLoopEntityModifier together with any other modifier to create an infinite loop.
This is done in the sample
Every modifier has 2 events if AddModifierListener was called:
B4X:
' ! --------------- ! MODIFIER EVENTS ! -------------- !

Sub RotationModifier_Started
   'Log("Started")

End Sub

Sub RotationModifier_Finished
   'Log("Stopped")

End Sub
XI. AndTimerHandler
TimerHandlers are the same like their Basic4Android versions Timers, but is more optimized for AndEngine and it's easy to use.
B4X:
Dim TimerHandler As AndTimerHandler
'Event - Milliseconds - autoreset
TimerHandler.Initialize("TimerHandler", 1/20, True)
Scene.RegisterUpdateHandler(TimerHandler)
Every TimerHandler has 1 event
B4X:
' ! --------------- ! TIMERHANDLER EVENTS ! -------------- !

Sub TimerHandler_TimePassed
   Text.Text = "FPS: " & fps.fps

End Sub
XII. AndFPSCounter
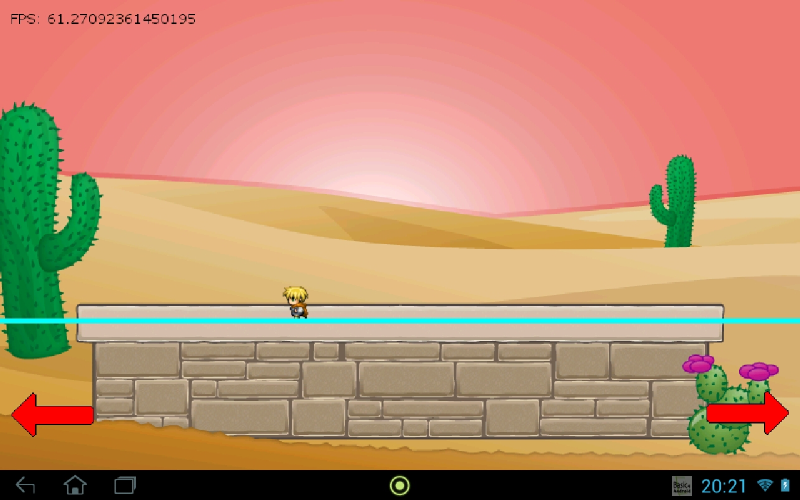
Showing the FPS (Frames Per Seconds) can be done easily with AndFPSCounter and a TimerHandler
B4X:
Dim fps As AndFPSCounter
fps.Initialize("FPS") 'loadResources
AndEngine.RegisterUpdateHandler(fps) 'populate Scene after requestEngine
Text.Text = "FPS: " & fps.fps 'Add this in a TimerHandler
XIII. Physics
Beta version 1.03 introduces 4 new RSAndEngine objects:
- AndPhysicsWorld
- AndPhysicsBody
- AndPhysicsConnector
- AndPhysicsConstants
AndPhysicsWorld
A physics world is a physical representation of our game. Gravity forces can be applied to it and it should be registered to a scene. All objects that belongs to that physics world will receive the applied forces of that world.
While creating a new physics world, we have to specify our gravity forces, first one for the x-component, second one for the y-component. In most cases, we will use 0 in first one. But you might specify there your own value, if you want to stimulate y-component force, for example similar to the WIND.
B4X:
Dim PhysicsWorld As AndPhysicsWorld
'Create a physics world and attach it to the main scene.
PhysicsWorld.Initialize("PhysicsWorld", 0, PhysicsConstants.GRAVITY_EARTH, False)
Scene.RegisterUpdateHandler(PhysicsWorld)
Contact Listener
A contact listener listens for contacts in the physics world between 2 bodies.
You can easily register a contact listener with:
B4X:
'Add a contact listener to this world.
'This will raise events if a contact between 2 bodies exists.
PhysicsWorld.AddContactListener
This will raise 4 events:
B4X:
' ! --------------- ! PHYSICS WORLD EVENTS ! -------------- !

Sub PhysicsWorld_BeginContact (BodyA As Object, BodyB As Object)
   Dim bA As AndPhysicsBody
   Dim bB As AndPhysicsBody

   bA = BodyA
   bB = BodyB

   'If Player collides with ground
   If bA.UserData == "Player" AND bB.UserData == "Ground" Then
      'We add this parameter +1
      jumpCount = jumpCount + 1
   End If
End Sub

Sub PhysicsWorld_EndContact (BodyA As Object, BodyB As Object)
   Dim bA As AndPhysicsBody
   Dim bB As AndPhysicsBody

   bA = BodyA
   bB = BodyB

   'If Player collides with ground
   If bA.UserData == "Player" AND bB.UserData == "Ground" Then
      'We add this parameter +1
      jumpCount = jumpCount - 1
   End If
End Sub

Sub PhysicsWorld_PostSolve

End Sub

Sub PhysicsWorld_PreSolve

End Sub
AndPhysicsBody
A PhysicsBody is an invisible object that you can attach to any entity. By attaching this to that entity,
it will will be under the influence of the forces of the physicsworld it belongs to.
In the AndEngine BOX2D Extension we distinguish the following types of Bodies:
- Static
- Kinematic
- Dynamic
1. Static Body:
A static body does not move under simulation and behaves as if it has infinite mass
(in another words it keeps all the time the same position, won't react for any forces such as gravity etc)
Example of usage: grounds in side scroll games.
2. Kinematic Body:
A kinematic body moves under simulation according to its velocity. Kinematic bodies do not respond to forces. They can be moved manually by the user, but normally a kinematic body is moved by setting its velocity. In another words it won't interact with dynamic bodies for example, won't react for forces like gravity etc)
Example of usage: moving platform, which is constantly moving for example in left and right direction like in many side scroll games.
3. Dynamic Body:
A dynamic body is fully simulated. They can be moved manually by the user, but normally they move according to forces. A dynamic body can collide with all body types.
Example of usage: moving character (player) or for example bullet.
By setting user data, we are providing a 'global identifier' for our body, with this easy way, we may easily recognise contacts between bodies. You can see it as a Basic4Android tag. (See Contact listener)
B4X:
Dim PlayerBody As AndPhysicsBody
'Attach a dynamic body to your sprite
'We add the body to the physicsworld, to the sprite, give it a dynamic body and specific the density, elasticity and friction
PlayerBody.Initialize(PhysicsWorld, Player, PhysicsConstants.DYNAMIC_BODY, 1, 0.5, 0.5)
PlayerBody.UserData = "Player"
AndPhysicsConnector
A PhysicsConnector will connect your entity together with your body. So for example if you have a moving character, you would like your body to follow the sprite, and due a body is invisible, it can easily be attached to your entity.
You don't have to do this for static bodies, like ground, ...
B4X:
Dim PhysicsConnector As AndPhysicsConnector
'Now we need to let the body follow the character. This is done with a physicsconnector
PhysicsConnector.Initialize(Player, PlayerBody, True, True)

'If you want to create moving body (means it has to be Dynamic or Kinematic type)
'you have to also register Physics Connector. What does it mean?
'It will cause that your shape/sprite will simply follow body,
'without registering physics connector, you won't notice difference
'(by default bodies are invisible) so you would notice only your shape/sprite
'all the time In the same position.
PhysicsWorld.RegisterPhysicsConnector(PhysicsConnector)
And that's it! Physics is actually really easy in RSAndEngine!
XIV. Multitouch
Adding multitouch in your game is very simple.
First you need to tell your engine that your game uses multitouch. This can be done with the EngineOptions
B4X:
EngineOptions.NeedsMultiTouch = TrueThen we check if the device actually supports multitouch and if it does, we register our multitouchcontroller to the engine. Make sure to call this after AndEngine.RequestEngine in LoadResources! There is the possibility that the engine hasn't loaded yet before LoadResources.
B4X:
If EngineOptions.isMultiTouchSupported = True Then
   AndEngine.setMultiTouchController
   Log("Multitouch is supported! :D")
Else
   Log("Multitouch is not supported! :(")
End If
XV. TMX Tiles
TMX (Tile Map XML) is a XML based format, that is mainly human readable but still has very small file-sizes. The biggest plus of the TMX format is that it has a fully featured and easy to use cross-platform Map-Editor called “Tiled”, which can be obtained for free here: Tiled Map Editor
The TMX map format used by Tiled is a flexible way to describe a tile based map. It can describe maps with any tile size, any amount of layers, any number of tile sets and it allows custom properties to be set on most elements. Beside tile layers, it can also contain groups of objects that can be placed freely.
AndTMXLoader
AndTMXLoader will load the map from the assets folder into a TMXTiledMap.
B4X:
TMXLoader.Initialize("TMXLoader", "mario.tmx")Note: The first time you will use TMX, it might be some hassle and it might gives some errors like Nullpointers. Doing a quick google can help you fix these problems.
1. Make sure the tileset you used is also in the assets folder together with the .tmx file
2. Always fill your entire map with tiles. If not, this could result in a NPE. (Base64 zlib supported., you can change this to XML to get rid of the error)
TMXLoader raises 2 events:
B4X:
' ! --------------- ! TMX EVENTS ! -------------- !

Sub TMXLoader_TileCreated (TiledMap As Object, Layer As Object, tile As Object, Properties As Object)
   Dim mProp As AndTMXTileProperties
   Dim mTile As AndTMXTile

   mProp = Properties
   mTile = tile

   'If there's ground here
   If mProp.ContainsTMXProperty("ground", "true") Then
      'We create a rectangle body
      Dim mRect As AndRectangle
      mRect.Initialize(mTile.TileX, mTile.TileY+2, mTile.TileWidth, mTile.TileHeight)
      mRect.Alpha = 0
      Dim GroundBody As AndPhysicsBody
      GroundBody.Initialize(PhysicsWorld, mRect, PhysicsConstants.STATIC_BODY, 0, 0, 0)
      GroundBody.UserData = "Ground"

      Scene.AttachChild(mRect)
   End If
End Sub

Sub TMXLoader_Error (Message As String)
   Log("Error: " & Message)
End Sub
Tiled is very easy to use and you can give every tile a certain property with a given Name and Value.
For example: Name="ground" & Value="true". This means that position on the map with that given tile will have the property ground with a value of true.
Now let's explain how the above code works:
When loading the map, it will iterate over every tile in the map and will raise an event with the map, layer, tile and properties.
The code checks if the given tile has a property with name: ground and value: true (as strings).
If it does, we create a rectangle over the tile and add a static physics body to it to show it as ground. Easy right!?
AndTMXTiledMap
A TMXTiledMap is the map which was loaded from the TMXLoader.
B4X:
TMXMap.Initialize(TMXLoader.TMXTiledMap)AndTMXLayer
A TMXLayer is the layer from the map.
You can have multiple layer where you can add your tiles to.
An example with multiple layers is for example in a 3/4 view (e.g Zelda, pokemon) where the character has to run behind a house.
You can use different layers for the house and the ground. So that the character walks behind the house, rather then visually on the roof.
B4X:
TMXLayer.Initialize(TMXMap.TMXLayers.Get(0))
'And we add the layer to the scene.
Scene.AttachChild(TMXLayer)
All this should be called in _CreateScene!
Because here is where we will load and create the scene. So the TMXLoading, TMXTiledMap and TMXLayer should be called in _CreateScene and NOT in _LoadResources.
AndTMXTile
An AndTMXTile represents a tile on the map. AndTMXTile has a various set of getters to achieve everything you want.
AndTMXTileProperties
AndTMXTileProperties gives your the properties of a specific AndTMXTile.
For example you can check if the tile contains specific Name and value
More information
And that concludes our tutorial for RSAndEngine. Creating a game with RSAndEngine in Basic4Android is actually a lot easier then it looks like.
You can make a great game in just a couple of hours and it's A LOT easier with Basic4Android then doing it Eclipse.
However because AndEngine is such a massive library, it's almost impossible for me to wrap every method and every class to B4A.
When I started this library and game engine, I had some knowledge about sprites, camera, scenes, ... but the physics part was completely new to me.
But it seemed to be that the physics part was way easier then I first anticipated!
Special credits goes to Nicolas Gramlich ofcourse, the developer of AndEngine and Matim from AndEngine Tutorials - creating android game using AndEngine. for his excellent AndEngine tutorials which helped me alot.
Also huge thanks to my beta testers for helping me wrapping this excellent library.
(And ofcourse Erel for his wonderful product)
Regards,
Tomas
Last edited: