Hello,
the Output is not optimal. Have a look down, to Erels code snip for better results.
With this snip, you can easy change a Bitmap/Icon Color. This only makes sense if the picture is monochrome with a transparent background like Icons.
Usage:
Function:
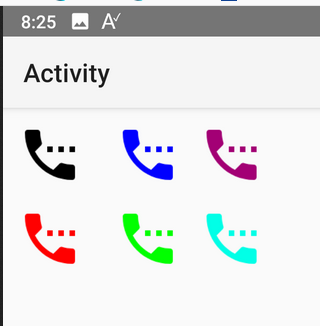
Example:

Right Original and Left the changed Version.
The Output is not optimal, maybe you know to make it better, then i will update.
the Output is not optimal. Have a look down, to Erels code snip for better results.
With this snip, you can easy change a Bitmap/Icon Color. This only makes sense if the picture is monochrome with a transparent background like Icons.
Usage:
B4X:
ImageView1.Bitmap = ChangeImageColor(ImageView1.Bitmap,Colors.Green)Function:
B4X:
Sub ChangeImageColor(icon As B4XBitmap,clr As Int) As B4XBitmap
    Dim bc As BitmapCreator

    bc.Initialize(icon.Width,icon.Height)
    bc.CopyPixelsFromBitmap(icon)

For y = 0 To bc.mHeight -1
    For x = 0 To bc.mWidth -1

        If bc.IsTransparent(x,y) = False Then

                bc.SetColor(x,y,clr)

        End If

    Next

Next

Return bc.Bitmap

End Sub
Example:
Right Original and Left the changed Version.
The Output is not optimal, maybe you know to make it better, then i will update.
Last edited: