Ola
Download
NB: Open and run the project in the Library folder to have the latest library version.
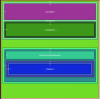
We attempted to create a News App using BANano. Now we will attempt an online store. Only the basics are being covered here and nothing extensive. What we want to achieve is something like this..
We are using VueX, a global data store for VueJS and Vuetify. We have a navigation bar for the store and cart, some featured products and some functionality.

We need products to sell, so lets define these as list.
We will show 3 products at a time. Thus we define a vertical product layout so that we can loop and show each product in a column. We create our layout for the products we want to see. We want the image, the price, a header and add to cart functionality showing..

Each product is created using a card layout. We bind the product image with roduct.image, on the product name, we also create another binding with {{ product.name }}
On the price we do the same thing with R {{ product.price }}
Like I said, we want to show 3 products at a time, so we create a row with a column (that loops) with a v-for directive.
(product, i) in $store.state.products.slice(0, 3)
We are using routers for the pages and thus, when one selects the Store on the navbar, the address bar should be

For the cart, it will be,

As noted, there is no hamburger on the navbar, this is hidden and should be shown on small devices only..

This is a wrap of this repo
#To be continued...
Download
NB: Open and run the project in the Library folder to have the latest library version.
We attempted to create a News App using BANano. Now we will attempt an online store. Only the basics are being covered here and nothing extensive. What we want to achieve is something like this..
We are using VueX, a global data store for VueJS and Vuetify. We have a navigation bar for the store and cart, some featured products and some functionality.
We need products to sell, so lets define these as list.
B4X:
Sub Build_Products
    Products.Initialize
    Products.add(CreateMap("image": "./assets/product-1.jpg", "name": "Nintendo Switch", "price": 299.99))
    Products.Add(CreateMap("image": "./assets/product-2.jpg", "name": "Gameboy Mug", "price": 19.99))
    Products.Add(CreateMap("image": "./assets/product-3.jpg", "name": "Family Computer", "price": 70))
    Products.add(CreateMap("image": "./assets/product-4.jpg", "name": "Jeopardy Game", "price": 30))
    Products.Add(CreateMap("image": "./assets/product-5.jpg", "name": "Game Cube", "price": 99.99))
    Products.Add(CreateMap("image": "./assets/product-6.jpg", "name": "Gameboy Color", "price": 45))
    ' try and use vuex for the data store
    MyApp.SetDataVuex("products", Products)

    Prices = MyApp.newlist
    Prices.AddAll(Array("Any","Under R25", "R25 to R100", "R100 to R500", "Over R500"))
    MyApp.SetDataVuex("prices", Prices)
End Sub
We will show 3 products at a time. Thus we define a vertical product layout so that we can loop and show each product in a column. We create our layout for the products we want to see. We want the image, the price, a header and add to cart functionality showing..
Each product is created using a card layout. We bind the product image with
roduct.image, on the product name, we also create another binding with {{ product.name }}On the price we do the same thing with R {{ product.price }}
Like I said, we want to show 3 products at a time, so we create a row with a column (that loops) with a v-for directive.
(product, i) in $store.state.products.slice(0, 3)
We are using routers for the pages and thus, when one selects the Store on the navbar, the address bar should be
For the cart, it will be,
As noted, there is no hamburger on the navbar, this is hidden and should be shown on small devices only..
This is a wrap of this repo
#To be continued...
Last edited: