Mashy Teaches WebApp/Website Development with BANanoVuetifyAD3 - The New Series

Mashiane

Expert
Licensed User
Longtime User
@NGUYEN TUAN ANH

My friend, I beg you. It was only 2 days ago when I requested you to always start a new thread for your question.

In the first post this is also clear..

1652371438811.png


I kindly request you to please honor my request.

Again, please start a new thread for your question. Prefix it with [BANanoVuetifyAD3]

I hope you understand...
 

NGUYEN TUAN ANH

Active Member
Licensed User
@NGUYEN TUAN ANH

My friend, I beg you. It was only 2 days ago when I requested you to always start a new thread for your question.

In the first post this is also clear..

View attachment 129175

I kindly request you to please honor my request.

Again, please start a new thread for your question. Prefix it with [BANanoVuetifyAD3]

I hope you understand...
So Sorry, I will learn from it and not do it again
 

Mashiane

Expert
Licensed User
Longtime User
Adding a tour guide to your app using Enjoy Hint


Example Source

B4X:
hints.Initialize
    hints.AddStep("trProjects", "The treeview will have your models, views and components you have defined. You are able to add, update and delete anything you create by clicking the corresponding buttons.")
    hints.AddStep("tabPreview", "Here you can get a preview of your elements, HTML and B4X generated code.")
    hints.AddStep("propdrawer", "This will hosts the property bag to change any element in your project. Enter the details necessary.")
    hints.AddClick("trprojectsadd", "Click here to add a new project.")  
    hints.AddStep("propCol", "Then update the details of the property bag according to your needs.")
    hints.AddStep("propBar", "This toolbar has buttons, each with a tooltip to guide you of their functionality. You can click Save.")
    hints.AddStep("tabpreviewtab1", "Here you are able to get a sneek preview of how your form / element will look like.")
    hints.AddStep("tabpreviewtab2", "Here you get the HTML code of the elements showing in your preview or being edited.")
    hints.AddStep("tabpreviewtab3", "Here you get generated B4x code for the element you are working on.")
    hints.AddStep("tabpreviewtab4", "Here you get PHP REST API source code generated from your data models.")
    hints.EndsOn("tabpreviewtab4", "Got It!")
hints.Run
 
Last edited:

Mashiane

Expert
Licensed User
Longtime User
BANanoVuetifyAD3 API i.e. Documenting the BVAD3 library

NB: The API depends on a PHP Web Server running, you can get the latest BVAD3 version + Kitchen sink and run a local copy. GitHub + Netlify are for "static" websites, so you might not see the documentation there.


Hi there, this video is about the Banano vue-tify API. We believe that creating your web projects should be easy. This also means that there should be documentation that can help you, when you want a reference point.

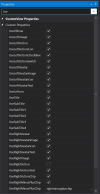
The API is made up of all the code classes that make up banano vue-tify. Each class is made up of properties, events and methods, where available.

The properties for the classes that are defined from vue-tify, will replicate the API found on the vue-tify website, which were converted to b4x custom views for our project.

At anypoint, one is able to export the documentation to excel, pdf and csv, by clicking on the toolbar buttons on the table.

If you have used b4x custom views before, you will notice the similarities in the definitions, being key, display value, field type, options, that is list, and then the description.

You can use the exported content to help you learn about each custom view element, its events, its methods and the kind of attributes you can use when creating your web projects.

All of this information is what you experience when using the b4x IDE intellisense, and the abstract designer for creating your web projects. Besides, we attempt as much as possible to follow the same methodology that you are accustomed to, in creating android and IOS apps via the b4x IDEs.

As this library is large, there is no expectation for anyone to remember everything, that is why we have broken up the API into small segments, so that you can just open the API in response to the element you want to learn about.

Also note that, the new awesome kitchen sink, whilst it has all the element examples, has not even gone deep into each elements attributes, methods and events. This is because with just basic settings, one can have an app running in no time. However the library needed to be all encompassing, first for beginners and then advanced use cases.

You can start exploring the Banano vue-tify AD3 API right away from github or netlify. Make it your best friend when creating your next web app.

I would greatly recommend that you just start on the elements you are interested in using on your next or current project. Find out how they are set up via the properties, find out which events they fire, find out which methods you can call from them, and then use the b4x IDE to your best advantage.

Remember, you generate your views via the abstract designer, these are based on this API, which is also based on the vue-tify API. Then you generate events, load the layout and then write code on your event callbacks. All you have to worry about is how your app looks and its functionality, everything else has been done for you.

The rest of this new awesome kitchen sink deals with how each of the pages you see has been created via the abstract designer. These have very minimal code written, except of course for the data-base related pages.

Again, should you require clarity on any functionality of the library, you are welcome to ask questions via the b4x forum and also on the telegram BVAD3 channel. Happy BVAD3 coding!

By the way, there has not been any javascript, css or html that was written to create this web app. That is the power of the b4x eco-system.
 
Last edited:

Mashiane

Expert
Licensed User
Longtime User
 

Mashiane

Expert
Licensed User
Longtime User
VueTable Dynamic Columns At Runtime.

This is one of the best presentations of how you can have dynamic columns in your table. The ReloadFromURLWait call on the VueTable, when it receives any URL or ./assets/jsonfile.json, it will read the first row, create columns based on that row.

The most important calls here on the VueTable to do that are and should be done as follows

  1. vt.Reset - clears the existing schema of the table
  2. vt.AddColumn - add any column you want
  3. vt.UpdateHeaders / RefreshHeaders - ensure that the new headers are creatd
  4. vt.Reload / UpdateRows

B4X:
'RT create columns from the url and autoconfig
Sub ReloadFromURLWait(url As String) As Boolean
    'reset the table structure
    Reset
    'get the data
    Dim records As List = BANano.Await(BANano.GetFileAsJSON(url, Null))
    If records.Size > 0 Then
        'get the first record
        Dim rec1 As Map = records.get(0)
        'build the column names
        For Each k As String In rec1.Keys
            'ensure the titles are proper case
            Dim title As String = BANanoShared.BreakAtUpperCase(k)
            title = BANanoShared.ProperCase(title)
            k = k.tolowercase
            'add each column
            AddColumn(k, title)
        Next
        'update headers
        UpdateHeaders
        'convert each record to have lowercase keys
        BANanoShared.ListOfMapsKeysToLowerCase(records)
        'update records on table
        Reload(records)
    End If
    Return True
End Sub

If you want to update the "rows" in the table whilst the headers are the same just call
  1. vt.Reload
By default, each row in the table, is composed of a list of maps. Each key on this map should have lowercase keys. Thus,

  1. BANanoShared.ListOfMapsKeysToLowerCase(records)
 
Last edited:

Mashiane

Expert
Licensed User
Longtime User
 

Mashiane

Expert
Licensed User
Longtime User
Adding a Universal MessageBox

A universal MessageBox is a messagebox that is created once in the app and is available in the complete app from any page.

For this to be possible, the messagebox should be created in the pgIndex and then can be called anywhere from the app.

One is able to (a) raise and alert, (b) raise a confirmation and (c) raise a prompt.

Reproduction

Open the baselayout and drop a VMsgBox inside the VApp component. The msgBox shoul be placed insid VApp and not anywhere where.

Ensure that you check the App Dialog property:

1654050498431.png


Generate members inside pgIndex so that it will be usable for the app. Ensure you include OK_click and CANCEL_click for the new msgbox.

These two subs should have ONLY the lines of code adde and NOTHING else. In my example, the dialog name is "appdialog"

B4X:
Private Sub appdialog_Ok_Click (e As BANanoEvent)
    vuetify.ActivePageOkResponse
End Sub

Private Sub appdialog_Cancel_click (e As BANanoEvent)
    vuetify.ActivePageCancelResponse
End Sub

When ok / cancel is clicked, these subs locate specific subs on those pages. These are OkResponse and CancelResponse

On any page that needs to call the universal message box for alerts, prompts, confirmation, you need to

1. Add the OkResponse and CancelResponse callbacks.

In Initialize of the page, before AddRoute, add these 2 lines

B4X:
page.AddMethod("OkResponse", Null)
    page.AddMethod("CancelResponse", Null)

This registers the methods for use.

2. Declare the callbacks.

B4X:
'dialog clicked in pgIndex
private Sub OkResponse
    'get the response
    vuetify.HideDialog
    Dim lastProcess As String = vuetify.Process
    Dim enteredValue As String = vuetify.GetResponseValue
    vuetify.ShowSwalSuccess("App Ok: " & lastProcess & " : " & enteredValue)
End Sub

'dialog clicke in pgIndex
private Sub CancelResponse
    vuetify.hidedialog
    Dim lastProcess As String = vuetify.Process
    vuetify.ShowSwalError("App Cancel: " & lastProcess)
End Sub

We need the .Process and .GetResponseValue (for prompts) here.

Calling the messagebox

Showing an Alert

B4X:
Private Sub btnAlert_Click (e As BANanoEvent)
    vuetify.Alert("app_alert", "Alert", "This is a app alert", "Great!")
End Sub

This will show the alert and send the process app_alert to OkResponse, use Vuetify.Process to find out which process was calling the MessageBox.

Showing a Confirmation

For a confirmation, depending on what you have clicked, the response can be to OkResponse (when ok is clicked) or CancelResponse (when cancel is clicked)

B4X:
Private Sub btnConfirm_Click (e As BANanoEvent)
    vuetify.Confirm("app_confirm", "Confirm Delete", "Are you sure you want to delete this?", "Yes", "No")
End Sub

So CancelResponse will trap the Cancel click.

Getting content from a Prompt

B4X:
Private Sub btnInput_Click (e As BANanoEvent)
    vuetify.Prompt("app_prompt", "First Name", "What is your first name", "", "", "Mashy", "Ok", "Cancel")
End Sub

When ok is clicked, what the user enters is returne by vuetify.GetResponsValue

This has been added to the kitchen sinks Whats New Section.

1654051308268.png
 

Mashiane

Expert
Licensed User
Longtime User
Creating Steppers with Form Inputs - Part 01

When you are finished with this exercise, you should be able to create this stepper control with vform + vfields.

InputStepper03.gif


This is assuming you have already created a BVAD3 project.

1. First ensure you have the latest version of the libraries.

1655158105289.png


2. Add a blank page to your project. Click Project > Add New Module > Class Modules > BVAD3 Page
Type in the name of your page.

3. Update name and layout name of your project. Usually for the layout, I just suffix the word layout to it. For example, you will note that the page name is "stepperinput" and the layout name is "stepperinputlayout"

4. Open the Abstract Designer and add a VContainer to it. Stretch the VContainer to fill the compete designer area. Add a Vrow inside the VContainer. Inside that VRow add a VCol and set the Cols property to 12. Inside the VCol add a VStepper.

5. For this VStepper example, we will use 3 steps, Step 1, Step 2 and Step 3.

1655158440678.png


The active step will be the first step. Internally the steps will be numbered from 1..n dependending on how many titles we use.

InputStepper01.gif
 
Last edited:

Mashiane

Expert
Licensed User
Longtime User
Creating Steppers with Form Inputs - Part 02

Creating Form Inputs using VForm + VField


Each step content in the VStepper is placed inside a content area. As per ReadMe Items in the component, this has been noted

Item contents IDs are [componentname][step]content. You can add containers with these item IDS or use BANano.LoadLayout with the 'Content' call here passing it the step number. This uses step numbers no keys
Our VStepper name is VStepper1.

So this means for out steps, being step1, step2 and step3, we need to place contents inside

  • VStepper11content (this being [componentname][step]content)
  • VStepper12content
  • VStepper13content
Inside the VStepper1 element, add 3 VForms and set the ParentID of each form to point to the relevant step.

1655159714587.png


Inside each VForm, add a VField, set its Component Type to be H1 and leave it set at Row 1, Col 1. We will add more form input components to the VForm.

Now if your run you should see this...

InputStepper02.gif
 

Mashiane

Expert
Licensed User
Longtime User
Creating Steppers with Form Inputs - Part 03

Inside the first vform inside the VStepper, we already have a H1 sitting at R1C1. (This is just optional and can be removed)
Add 2 extra vfields (you can just copy the previous one) and set them as follows.


  • VField1 - txtfirstname
  • fieldname - firstname
  • Title - First Name
  • Row - 2
  • Col - 1

  • VField2 - txtlastname
  • fieldname - lastname
  • Title - Last Name
  • Row - 2
  • Col - 2

1655160601560.png


You can continue adding more controls on the form as you wish.
The tutorial of how to use VForm and VField already exists on this thread.

Check the New Awesom Kitchen Sink : Whats New Section about this example.
 

Mashiane

Expert
Licensed User
Longtime User
Creating Tabs with Form Inputs

By the end of this lesson, you should be able to create tabs with inputs.

tabswithinputs.gif


Just like the Stepper component step, each item in the Tabs is made up of

Item contents IDs are [componentname][item]content. You can add containers with these item IDS or use BANano.LoadLayout with the 'Content' call here
So one needs to add content inside those areas.

Our tab items however expects their own keys inline the steps, so we create 3 keys, tb1, tb2 and tb3.

1655162679173.png


Following the same approach as before for the VStepper, we specify the ParentID for each form we put inside the VTabs, these being

VTabs1tb1content, VTabs1tb2content and VTabs1tb3content - based on the Tab Keys.

Also, we change the tag of each form incluing the fluidity:

1655164180032.png

'
1655164204720.png

'
1655164223722.png
 
Last edited:

Mashiane

Expert
Licensed User
Longtime User
Creating Expansion Panels with Form Inputs

By the time you complete with this, you should be able to create ExpansionPanels with Forms.

ExpansionPanelForms.gif


For this example, we use the ExpansionPanels with Form Inputs. We will follow suit from the above examples.

We create an vExpansionPanels with 3 items..

1655165211164.png


The keys are one; two and three.

Item contents IDs are [componentname][item]content. You can add containers with these item IDS or use BANano.LoadLayout with the 'Content' call here

Our VExpansionPanel name is VExpansionPanels1, so our content areas are VExpansionPanels1onecontent, VExpansionPanels1twocontent an VExpansionPanels1threecontent.
 

Mashiane

Expert
Licensed User
Longtime User
QRCodes, BarCodes and Signatures

You can use a qr code, barcodes from this post to test this example.

The purpose of this lesson is to show how to use the QRCodeReader, BarcodeReader and the SignaturePad.
 

Attachments

  • QRReader.zip
    25.1 KB · Views: 157
Last edited:

Mashiane

Expert
Licensed User
Longtime User
Customizing the Off & On Icons for v-checkbox and v-radiogroup.

As you might be aware, you cannot use the v-radio as a stand alone, you need to use it by using the v-radio-group component.

With the checkbox, there are 2 properties, the on and off icons. Here you can specify the look and feel of your checkbox and radio when these are checked / not.

1656357323361.png


See how this works below:

CheckRadioIcons.gif


PS: This will be part of the kitchen sink demos.
 

Mashiane

Expert
Licensed User
Longtime User
Creating a Mini Nav Drawer

A mini drawer can be used as a smaller version of the drawer. It can activate itself on hover and also can be activated by an event, like a hamburger click.

In this example, instead of the normal icons to our nav items, we have used avatars. In the drawer, just check this option

1657038902213.png


What it does is to turn the other revant options on: These are

  • Closed = true
  • ExpandOnHover
  • MiniVariant
  • Permanent

For this example the mini variant width was set to 60.

MiniDrawer.gif


When you hover the mouse over the drawer, it will expand and when you click the hamburger it will also collapse and expand. To be able to do, we use ToggleExpandOnHoverOnApp

B4X:
Private Sub apphamburger_ClickStop (e As BANanoEvent)            'ignoreDeadCode
    appdrawer.ToggleExpandOnHoverOnApp(vuetify)
End Sub

The code to add the avatars is also easy..

B4X:
Sub created        'IgnoreDeadCode
    'close the drawer
    appdrawer.CloseOnApp(vuetify)
    'clear the listview
    drwlist.ClearOnApp(vuetify)
    drwlist.AddAvatarTitleSubTitle("", "user1", "https://randomuser.me/api/portraits/med/men/75.jpg", "Random User 1", "Telephone:",  "/")
    drwlist.AddAvatarTitleSubTitle("", "user2", "https://randomuser.me/api/portraits/med/men/15.jpg", "Random User 2", "Telephone:",  "/")
    drwlist.AddAvatarTitleSubTitle("", "user3", "https://randomuser.me/api/portraits/med/men/25.jpg", "Random User 3", "Telephone:",  "/")
    drwlist.AddAvatarTitleSubTitle("", "user4", "https://randomuser.me/api/portraits/med/men/35.jpg", "Random User 4", "Telephone:",  "/")
    drwlist.AddAvatarTitleSubTitle("", "user5", "https://randomuser.me/api/portraits/med/men/45.jpg", "Random User 5", "Telephone:",  "/")
    drwlist.AddAvatarTitleSubTitle("", "user6", "https://randomuser.me/api/portraits/med/men/85.jpg", "Random User 6", "Telephone:",  "/")
    'refresh the drawer
    drwlist.RefreshOnApp(vuetify)
End Sub
 

Attachments

  • BVAD3MiniDrawer.zip
    15.8 KB · Views: 147
Last edited:

Mashiane

Expert
Licensed User
Longtime User
Creating a ListView - Avatars

In the previous example we created a NavBar Drawer with an embedded List that showed avatars.

In the same breath, lets look at how you can create a listview on your own page.

1. This requires a VList
2. This requires a VListOptions (This is used to build the schema of the listView)

As you will find out, there is nothing special that we have done here, but just use the same code as the previous example and just changed the references to the images.
Also images stored on ./assets/? can be used

ListViewAvatars.gif


Whilst this can be done on created, we have used mounted.

B4X:
Sub mounted        'ignoreDeadCode
    'clear the listview
    VList1.Clear(page)
    VList1.AddAvatarTitleSubTitle("", "user1", "https://randomuser.me/api/portraits/med/men/10.jpg", "Random User 1", "Telephone:",  "")
    VList1.AddAvatarTitleSubTitle("", "user2", "https://randomuser.me/api/portraits/med/men/11.jpg", "Random User 2", "Telephone:",  "")
    VList1.AddAvatarTitleSubTitle("", "user3", "https://randomuser.me/api/portraits/med/men/12.jpg", "Random User 3", "Telephone:",  "")
    VList1.AddAvatarTitleSubTitle("", "user4", "https://randomuser.me/api/portraits/med/men/13.jpg", "Random User 4", "Telephone:",  "")
    VList1.AddAvatarTitleSubTitle("", "user5", "https://randomuser.me/api/portraits/med/men/14.jpg", "Random User 5", "Telephone:",  "")
    VList1.AddAvatarTitleSubTitle("", "user6", "https://randomuser.me/api/portraits/med/men/15.jpg", "Random User 6", "Telephone:",  "")
    'refresh the drawer
    VList1.Refresh(page)
    vuetify.Loading(False)
End Sub[./code]

PS: By fault, the RightChips will show on the list when run. You can turn this off via the abstract designer in the Options element. UseRightAction is turned off because we dont want anything on the right of each item in the listview. How these work was discussed before.

[ATTACH type="full"]131109[/ATTACH]

NB: Also note this call after loadlayout. This links the options to the list

[code]
'COMPULSORY: bind the options
    VList1.SetOptions(VListOptions1)

Happy Coding
 

Attachments

  • BVAD3MiniDrawer.zip
    20.7 KB · Views: 142
  • 1657037686839.png
    1657037686839.png
    66.7 KB · Views: 144
Last edited:
Top