B4R Question [IoT WiFi PLC] Industrial PLC arduino based

Bladimir Carrillo

Member
Licensed User
Longtime User
Hi all,

I am starting a simple project for industry that in a first phase consists of obtaining hours of machine operation and count of processed products to display them on an lcd screen, and also send them to a server through wifi using web sockets, for which I do not plan to use sensors, but only signals from relays proper to the machine; however, being an industry I need to use more robust and secure components than the typical arduino cards. The next phase will be to use sensors to obtain operating variables such as temperature, and other.

I have reviewed a IoT WiFi PLC arduino based ( http://www.digital-loggers.com/plc.html ) , manufactured by Digital Loggers Inc that incorporates several elements in a compact way, mainly the WiFi component that I do not find in other similar products.

plc-01.JPG


My knowledge of electronics is very small, so it will be very useful all your contributions to this project, as for code, connections, required componentes, functionality, considerations, and experience with this device.

Regards.
 

Bladimir Carrillo

Member
Licensed User
Longtime User
Thanks Erel,

Please could you explain in which tasks will the suggested card will help me?.

I attach something the manufacturer says about ESP8266 WiFi included...

The WiFi radio is based on the ESP8266 WiFi chip and is similar to ESP-02 design. The main difference ESP radios come with 16Mb=2MB FLASH, yours has 128Mb = 16MB. Note that it may take 7-8 minutes to fully format a 16MB chip. The ESP is is powered from it's own 3.3 volt regulator U6, which is controlled by Arduino pin D26. The radio uses Atmel serial port 2 for communication. There is no internal antenna, an external antenna is supplied for better WiFi range. The ESP8266's firmware can be upgraded through the Atmel, via WiFi or directly through an programming header, J9, available when the cover is removed. As provided, the ESP8266 is programmed with NodeMCU. It can be used as-is or reprogrammed with one of the many custom microcodes found on the Web. In code, the ESP8266 module may be power cycled by setting Arduino digital pin D26 low (power off) then high (power on). A number of public-domain tools and firmware options are available for the ESP8266. Popular platforms include the factory AT firmware, NodeMCU (includes a wonderful Lua interpreter), Arduino for the ESP8266 itself and Frankenstein. ESPLORER is a nice tool for experimenting with firmware options. We preloaded your PLC with NodeMCU because we've found it to be the most stable and reliable code base. It is memory hungry, though. We upgraded FLASH memory it to 128Mb=16MB at customer request. Consider it an "ESP on steroids".

If you attach D32 to 12-24V and DIN COM to ground, the PLC enters a factory test mode. It will check the SD card (press NEXT) to skip formatting, you then set time/date, it will then display the input status (D32 will be low), press next after that and you'll reach a relay test. There is then a digital output test, a speaker test, a UART loopback test, and finally, a WiFi test. This demo acts as an access point (AP). The device SSID shows as "Wi-Fi Test" The password is "password" (lower case). After authenticating, you can control relays, read ADCs, etc over WiFi. Firmware support is best obtained via the online communities. If you elect to use something other than NodeMCU, we'd suggest re-flashing the ESP8266 using connector J9 until your code is stable and proven. If you've opened the case, you can monitor the serial communication on J9 TX pin 3 and GND pin 1 to see how it all works.

Thank you again.
 
Upvote 0

Bladimir Carrillo

Member
Licensed User
Longtime User
Working with standard boards such as Arduino or ESP8266 is simpler as everything just works. Once you become more experienced it will be easier to work with a custom board.

Dear Erel,
Finally I received the NodeMCU 1.0 card.
I've done small tests with the Arduino IDE and it works fine.
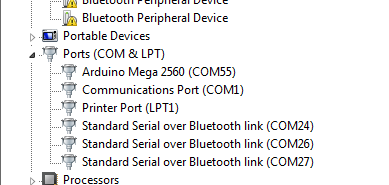
I am trying to connect via B4R (vesion 1.50), but the card does not appear on the serial port list (in the Board Selector window), even though I click the Refresh button.

upload_2017-1-24_11-53-57.png


Any suggestions please?
 
Upvote 0

Erel

B4X founder
Staff member
Licensed User
Longtime User
I'm not sure why the serial port is not detected. You can workaround it by explicitly setting the board options in the INI file.

https://www.b4x.com/android/forum/threads/b4r-ide-board-selector-problem.74134/#post-470793

You need to use the following values:
BoardName=NodeMCU 0.9 (ESP-12 Module)
BoardArgs=esp8266:esp8266:nodemcu:CpuFrequency=80,FlashSize=4M3M,UploadSpeed=115200
SerialPort=COM3

Make sure to close the IDE before changing those options.
 
Upvote 0

Bladimir Carrillo

Member
Licensed User
Longtime User
I'm not sure why the serial port is not detected. You can workaround it by explicitly setting the board options in the INI file...

Thanks Erel, run ok. Now I am ready to begin B4R testing.

I have made the first tests on NodeMCU 1.0 board, using Arduino IDE and Blynk. It's really great ...


The goal will be do it with B4R and B4A
 
Upvote 0

Bladimir Carrillo

Member
Licensed User
Longtime User
Working with standard boards such as Arduino or ESP8266 is simpler as everything just works. Once you become more experienced it will be easier to work with a custom board.

Until today I have made several tests with Nodemcu on B4R, B4A and B4J, all runs ok. Now I have a question ...

On Nodemcu features ( https://nodemcu.readthedocs.io/en/master/en/modules/pwm/ ) there is a PWM module that let enable pwm functionality to a D1 - D12 pins. How I can to do that with B4R ?
 
Upvote 0

Erel

B4X founder
Staff member
Licensed User
Longtime User
You will need to use a simple native C code: https://www.b4x.com/android/forum/threads/inline-c-c.65714/#content

For example:
B4X:
Private Sub AppStart
   Serial1.Initialize(115200)
   Log("AppStart")
   RunNative("Setup", Null)
   RunNative("SetDuty", 100)
End Sub

#if C
void Setup(B4R::Object* o) {
pwm.setup(1, 500, 512);
pwm.start(1);
}
void SetDuty(B4R::Object* o) {
pwm.setduty(1,o->toULong());
}
#End if
 
Upvote 0

Bladimir Carrillo

Member
Licensed User
Longtime User

Really interesting to use C or C ++ as suggested, thank you very much.

Going on testing with PLDuino PLC, just now I have the device on my hand. I share the link of the repository that contains all the programming modules and libraries used by the device.
https://github.com/digitalloggers/PLDuino

First of all, when power on PLDuino, run a demo composed of several modules (included in the repository) that allows to test the device's functionalities (WiFi access, SD card, Date / Time, Relays On / Of, etc.).

To use PLDuino with B4R probably need to embed C or C ++ code in the project, but it would be interesting to migrate PLDuino libraries to B4R.

What do you think ?
 
Upvote 0
Top