What is this?
As the title suggests, this tutorial shows you how to select an android theme based on what version of Android your app is run on.
Why do I need this?
You don't, but after reading this tutorial you may think it is a useful technique that you wasn't previously aware of.
How could I use it?
There are many ways this can be used. For this tutorial I will use, what I believe will be the most common case study. Creating transparent activities whilst allowing the use of Holo based themes when available.
The problem
We want to create a transparent activity in our app but we also want our app to use a Holo theme when run on HoneyComb +. An example for a use of a transparent activity is to add a panel and some other views to create the effect of a 'popup window'.
Using the manifest editor, we can utilize the Holo dark theme simply by setting the targetSDK to 11 or higher or use the Light theme by setting a theme like this
Many of us will have followed this advice to create said transparent activity
http://www.b4x.com/forum/basic4android-updates-questions/14824-hiding-activity.html#post84047
BUT, there is a problem. Theme.Translucent.NoTitleBar does NOT utilize the nice new Holo theme. So your app would use Holo.Light, but your transparent activity would use the older default theme. This will look very unprofessional.
The Holo themes' Transparent effect can be gained by setting your application theme to
But again, this has a problem. Run this on a device operating on an Android version less than HoneyComb (i.e. gingerbread) and you get an error as the theme simply doesn't exist.
So how do we stitch the 2 together? By setting the theme based on the version of Android in use. This does required creating some xml, but it's not too scary.
Here's what we do
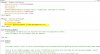
After you have created your b4a project, open the projects' folder and navigate to the \res\ folder. within res create 2 new folders 'values' and 'values-v11'. Inside each of these folders we need a 'theme.xml' file. So we end up with
Anything added to the theme.xml in the values folder will be used as default. Anything added to the theme.xml in the values-v11 will be use when android v11 (honeycomb) or above is in use.
OK, what to put in them? essentially we are going to create a custom theme, so we need to give it a name. For this tutorial, we will call it 'MyThemeTransparent'. We need to add this text to the files
\res\values\theme.xml
\res\values-v11\theme.xml
These files then need to be made read only!
Then in the b4a manifest editor, we use our custom theme like this:
PopupWindow being an activity we have created in b4a.
You may need to clean you b4a project for the theme resources to be recognized.
Advanced:
We can create more variants of our custom theme. Here is an example.
\res\values\theme.xml
\res\values-v11\theme.xml
This creates 3 variants.
MyTheme - A simple base theme that uses 'Theme.Light' on older versions of android and 'Theme.Holo.light' when available.
MyThemeNoTitle - As MyTheme but hides the titlebar (or ActionBar as it is now known)
MyThemeTransparent - Explained in tutorial above.
With this setup, i can set the base theme for the app using this in the manifest editor
Then use the other variants as explained above.
Hope this help some folks to make their apps look pretty.
Demo Project Below
This is a very simple demo to show you how things should look and feel after following this tutorial.
Hope it helps.
View attachment VersionThemeDemo.zip
As the title suggests, this tutorial shows you how to select an android theme based on what version of Android your app is run on.
Why do I need this?
You don't, but after reading this tutorial you may think it is a useful technique that you wasn't previously aware of.
How could I use it?
There are many ways this can be used. For this tutorial I will use, what I believe will be the most common case study. Creating transparent activities whilst allowing the use of Holo based themes when available.
The problem
We want to create a transparent activity in our app but we also want our app to use a Holo theme when run on HoneyComb +. An example for a use of a transparent activity is to add a panel and some other views to create the effect of a 'popup window'.
Using the manifest editor, we can utilize the Holo dark theme simply by setting the targetSDK to 11 or higher or use the Light theme by setting a theme like this
B4X:
SetApplicationAttribute(android:theme, "@android:style/Theme.Holo.Light")Many of us will have followed this advice to create said transparent activity
http://www.b4x.com/forum/basic4android-updates-questions/14824-hiding-activity.html#post84047
BUT, there is a problem. Theme.Translucent.NoTitleBar does NOT utilize the nice new Holo theme. So your app would use Holo.Light, but your transparent activity would use the older default theme. This will look very unprofessional.
The Holo themes' Transparent effect can be gained by setting your application theme to
B4X:
@android:style/Theme.Holo.Light.PanelBut again, this has a problem. Run this on a device operating on an Android version less than HoneyComb (i.e. gingerbread) and you get an error as the theme simply doesn't exist.
So how do we stitch the 2 together? By setting the theme based on the version of Android in use. This does required creating some xml, but it's not too scary.
Here's what we do
After you have created your b4a project, open the projects' folder and navigate to the \res\ folder. within res create 2 new folders 'values' and 'values-v11'. Inside each of these folders we need a 'theme.xml' file. So we end up with
B4X:
\res\values\theme.xml
\res\values-v11\theme.xmlAnything added to the theme.xml in the values folder will be used as default. Anything added to the theme.xml in the values-v11 will be use when android v11 (honeycomb) or above is in use.
OK, what to put in them? essentially we are going to create a custom theme, so we need to give it a name. For this tutorial, we will call it 'MyThemeTransparent'. We need to add this text to the files
\res\values\theme.xml
B4X:
<?xml version="1.0" encoding="utf-8"?>

<resources>
    <style
        name="MyThemeTransparent" parent="android:style/Theme.Translucent.NoTitleBar">
    </style>
</resources>
\res\values-v11\theme.xml
B4X:
<?xml version="1.0" encoding="utf-8"?>

<resources>
    <style
        name="MyThemeTransparent" parent="@android:style/Theme.Holo.Light.Panel">
    </style>
</resources>
These files then need to be made read only!
Then in the b4a manifest editor, we use our custom theme like this:
B4X:
SetActivityAttribute(PopupWindow, android:theme, "@style/MyThemeTransparent")PopupWindow being an activity we have created in b4a.
You may need to clean you b4a project for the theme resources to be recognized.
Advanced:
We can create more variants of our custom theme. Here is an example.
\res\values\theme.xml
B4X:
<?xml version="1.0" encoding="utf-8"?>

<resources>
    <style
        name="MyTheme" parent="android:style/Theme.Light">
    </style>

    <style
        name="MyThemeNoTitle" parent="android:style/Theme.Light.NoTitleBar">
    </style>

    <style
        name="MyThemeTransparent" parent="android:style/Theme.Translucent.NoTitleBar">
    </style>
</resources>
\res\values-v11\theme.xml
B4X:
<?xml version="1.0" encoding="utf-8"?>

<resources>
    <style
        name="MyTheme" parent="@android:style/Theme.Holo.Light">
    </style>

    <style
        name="MyThemeNoTitle" parent="@android:style/Theme.Holo.Light.NoActionBar">
    </style>

    <style
        name="MyThemeTransparent" parent="@android:style/Theme.Holo.Light.Panel">
    </style>
</resources>
This creates 3 variants.
MyTheme - A simple base theme that uses 'Theme.Light' on older versions of android and 'Theme.Holo.light' when available.
MyThemeNoTitle - As MyTheme but hides the titlebar (or ActionBar as it is now known)
MyThemeTransparent - Explained in tutorial above.
With this setup, i can set the base theme for the app using this in the manifest editor
B4X:
SetApplicationAttribute(android:theme, "@style/MyTheme")Then use the other variants as explained above.
Hope this help some folks to make their apps look pretty.
Demo Project Below
This is a very simple demo to show you how things should look and feel after following this tutorial.
Hope it helps.
View attachment VersionThemeDemo.zip
Last edited: