B4R Tutorial ESP32 Camera Picture Capture and Video Streaming! (Updated with code!)

Hello!

Last December I made a request for support for the ESP32 Camera support. Well, I finally found the time to work on it myself and here's my initial attempt at implementing this with B4R. I'm using an ESP32CAM camera board with 4GB of PSRAM (like extended memory for the camera). I'm using one similar to this one you can find on Amazon. The board has an OV2640 2MP camera and an SD card slot (it's worth mentioning this model does not have a USB interface so you'll need an FTDI programmer).

I started with knowing nothing about image capture or video streaming to a working prototype, after about a week, I'm happy to say it works :).

The B4R app allows for picture capture using a /pic URL and stream video using /live over HTTP.

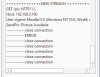
You can see a small demo of the screen capture and video on . The video shows my attempt to capture my daughter's toy duck picture (had a problem lining up the camera) using the /pic URL. Then I show video streaming from the camera in browser and inVLC using the /live URL. You can see the debug info as connections come in my B4R log window on the right of the screen.

The picture below is my ESP32 Camera board, my FTDI programmer on the left and my wiring.

devboard.jpg


Basically I'm using inline C to access the camera driver (which is now part of the Arduino library), and B4R WiFiServerSocket for the web server. It actually works quite well for a $10 camera and microcontroller. I plan on doing a full blown tutorial here on how it works and posting the source code (in the next day or so - I want to do a proper tutorial because I learned a lot during this fun project.

I want to contribute back to the community since I get so much from here. I hope you enjoy! :)

See the below lengthy tutorial and code :)
 
Last edited:

petr4ppc

Well-Known Member
Licensed User
Longtime User
Dear friends,

Before I start learning I want ask if it is possible to send the image (pic from camera) to FTP - using this great tutorial?

Thank you
p4ppc
 

miker2069

Active Member
Licensed User
Longtime User
Dear friends,

Before I start learning I want ask if it is possible to send the image (pic from camera) to FTP - using this great tutorial?

Thank you
p4ppc

Hello Petr4ppc (and everyone else), sorry for my delayed response on the Camera Library. I have a 2 year old, full time job, and also in the USA - so it's all crazy :)

p4ppc, I don't see why you can't sending via FTP. I'm sure you can refer to Erel's FTP post to setup the FTP part. Depending on how big your image is, you may be to send an in memory copy from the camera, else it will be good to save to SD Card (or perhaps flash if that's practical) and upload from there.
 

petr4ppc

Well-Known Member
Licensed User
Longtime User
Dear Miker2069,

first thank you for your NICE tutorial and very good work.
Thank you for your advice (i thought that FTP lib for esp8266 can not be used in ESP32 - I have asked for certain because of possibility of damaging my esp32).
I go to do some tests, one more - thank you very much
p4ppc
 

Hypnos

Active Member
Licensed User
Longtime User
Dear Miker2069,

first thank you for your NICE tutorial and very good work.
Thank you for your advice (i thought that FTP lib for esp8266 can not be used in ESP32 - I have asked for certain because of possibility of damaging my esp32).
I go to do some tests, one more - thank you very much
p4ppc

I also want to do the same thing but not success, It would be great if anyone can give some example if you can make it work. Thanks!
 

petr4ppc

Well-Known Member
Licensed User
Longtime User
Hypnos,

did you tried esp8266 FTP lib? I have tested it, but I can not connect to FPT server.

p4ppc
 

KiloBravo

Active Member
Licensed User
Now, I know this is an old thread (LOL), but ...
I just spent two hours trying to get this to work.
I have a FTDI programmer and an ESP32 Camera module. I wired it exactly as indicated in the thread.
Finally, determined. I could only program the esp32 at 3.3 volts. At 5 volts I got a bunch of errors.
But, once programmed the B4R App only ran at 5 volts not the programming voltage of 3.3 volts.
I am pretty sure I downloaded and did this a year ago and did not have the same problem.

I reread post #2 maybe that is what Miker2069 is indicating, but I didn't read it that way.
I.E Program at 3.3V and run Camera Board/App at 5 Volts.
Anyway if anyone else tries this and has a problem that might be your issue.

Thanks Miker2069, code works great as is ! :)
B4X it is all about the journey not the destination. LOL
 

DC1

Member
Licensed User
Longtime User
Hi
I think I'm missing something - the live streaming works just fine, if I try the pic taking I get the following Log message and nothing on the uSD.
Other than removing the gray scale option (commenting out) nothing else has changed in the B4R script - That I downloaded earlier today

Hope you can help
 

Attachments

  • pic error.png
    pic error.png
    6.5 KB · Views: 309

KiloBravo

Active Member
Licensed User
I get that too once in a while if it is taking a long time for the picture to display in the browser.
I am using the latest FireFox browser. The streaming seems extremely slow to me.

What frame rate are you getting and what resolution ? VGA SVGA ?
 

yaqoob

Active Member
Licensed User
Longtime User
Part 4 - Caveats

Looking at the code, you might wonder (among other things), why I wrapped calls to astream.Write in the following subs:


B4X:
'Helper Functions
'the aws (astream write stream) - is used to get around leaking stack buffer in a loop when sending strings to network, see description above
Private Sub aws(s As String)
 
    Astream.Write(s.GetBytes)
    Astream.Write(CRLF)
 
End Sub

'the awscrlf - same as above but just sends CRLF
Private Sub awscrlf()
 
    Astream.Write(CRLF)
 
End Sub

The short answer is Strings are created on the stack. So something like sending:

B4X:
Astream.Write("Content-type:image/jpeg")

In a loop (i.e. as a result of streaming) would cause a stack leak and the camera board would eventually panic and die. Wrapping the Astream.Write in a couple of helper functions that I can use in loops solves that as the the memory for strings are allocated/deallocated appropriately when the sub completes.

Another thing to mention (and most likely due to the attempt to figure out why my program was crashing as a result of the above). I make use of another helper routine:

B4X:
private Sub content_length_to_stream()
 
    Dim l As String
    l = NumberFormat(ESP32CAM.Length,1,0)
    Astream.write("Content-Length:").write(l).Write(CRLF) 'no need to call aws since this  astream.write is already wrapped in a helper function

For the same reason I described above - Strings memory leaks. calling the NumberFormat routine creates the string on the stack, and this is called repeatedly during streaming video. Wrapping it in a sub solves that.

Finally, I use a sub called "StreamGood()" all over the place in the web server code. Honestly it's probably not necessary to check *all the time* if the stream is good, as if the stream is "bad" astream_error should be called. Again I was hunting down why my program was crashing and it was ultimately a result of the string leaks. I ended up leaving it in as I can take appropriate action inside the streaming or chunking loops.

Well that's it - I will clean this up over the next day or so. I know it's a lot, I wanted to give you enough info and background so you can get started and avoid some of the mistakes I made (albeit a fun experience). Please let me know what you think :)

Thank you, Miker2069,
Very nice and detailed tutor. Your tutor saved me a lot of time and effort.
 

max123

Well-Known Member
Licensed User
Longtime User
My knowledge in the insides of the inline c is poor, however I thought of a (complicated...) way to make it work.
It goes like this:
1. Added a global to ESP32CAM module
B4X:
Public FS As Int = 3
2. Added this before the config definitions in the inline code:
B4X:
 framesize_t n[9];
  n[0] =   FRAMESIZE_UXGA ;
  n[1] =   FRAMESIZE_SXGA ;
  n[2] =   FRAMESIZE_XGA ;
  n[3] =   FRAMESIZE_SVGA ;
  n[4] =   FRAMESIZE_VGA ;
  n[5] =   FRAMESIZE_CIF ;
  n[6] =   FRAMESIZE_QVGA ;
  n[7] =   FRAMESIZE_HQVGA ;
  n[8] =   FRAMESIZE_QQVGA ;
....
 config.frame_size = n[b4r_esp32cam::_fs]; //FRAMESIZE_SVGA;     // FRAMESIZE_ + QVGA|CIF|VGA|SVGA|XGA|SXGA|UXGA
with this the framesize parameter will be read during init by the value of the FS variable.
Now what needed is "only" to re-init the camera with different value for the FS variable...
I noticed your comment
I did try it and failed.
Restarting the device will do the job, so I added EEPROM and ESP8266 libraries.
Added two new commands to the Astream_NewData sub:
B4X:
If bc.IndexOf(Buffer, "restart") <> -1 Then
        esp8266.Restart
 
    else If bc.IndexOf(Buffer, "size") <> -1 Then

        Dim k As Int = bc.IndexOf(Buffer,"size")
        ESP32CAM.FS = Buffer(k+4) - 48
        eeprom.WriteBytes(bc.IntsToBytes(Array As Int(ESP32CAM.FS)), 0)
 
 
    else If bc.IndexOf(Buffer, "GET") <> -1 Then
...

The controlling application (b4a) uses a spinner to select the required resolution and sends the command with /framesize & position:
B4X:
Sub Framespin_ItemClick (Position As Int, Value As Object)
    Log("position= "& Position)
    wv.StopLoading
    wv.LoadUrl("http://[my ip and port]/framesize" & Position)
    wv.Invalidate
End Sub
The position in the spinner is the same as the array in the b4r inline code as described above.
The commands can be sent from a browser in the same way.
The B4R app, receiving that command, extracts the number after "framesize" and saves it to the eeprom.
When the B4A sends reset command, the b4r restarts, reads the framesize number from the eeprom and initializes the camera with it:
B4X:
    Dim b() As Byte = eeprom.ReadBytes(0, 1)
    Dim k As Int = b(0)
    If k >=0 And k < 9 Then ESP32CAM.FS = k
    Log("k = " , k , " FS = " , ESP32CAM.FS)

I hope you can find a simpler solution but in the meantime this will do, I believe that similar approach can do for other parameters if they are read only at init. For my needs I don't think that I need realtime control of other parameters.

(1) Great work!
(2) Great tutorial!

I've six of these AIThinker ESP32CAM that I use for various purposes, eg. to stream live video of 3D Printing process for my 3D Printing Android host app (I wrote with B4A).

The video quality is not excellent, but for the cost it is quite usable on various low-cost projects, even it mount an ESP32 240Mhz dualcore very fast microcontroller with WiFi & BT, ucard slot etc....

The only big thing I've found with AIThinker ESP32CAM is that if you use SD_MMC, there you do not have free pins, If you do not use SD_MMC you have some free pins,
but I tried a lot of times to initialize SD_MMC to 1bit mode, and use new free pins for SPI connection, but without success.... this work for some seconds then hang and crash occour.

On my 3D Printer I use two of this, one for live video streaming and another to capture timelapse images, save it to uSD and send over TCP to my Android app that save it to internal memory, then show in an ImageView. At end of printing process I have a couples of images saved. The app have a dedicated page to mount a timelapse MP4 video with options like decoder type, resolution, bitrate, framerate and multiple custom mark points to set frames. Wth this I can set multiple frame intervals to make the final video, eg, from frame 0 to 800, from 20 to 300, from 600 to 700, even some pieces mounted in reverse, eg. from 500 to 0.

I wrote 2 sketch for ESP32CAM timelapse:
  1. Timer Timelapse With timer interval, eg. every X seconds it take a photo (Using this the final video timelapse show 3D Printer movements)
  2. Triggered Timelapse It is the 3D Printer itself that trigger the ESP32CAM, at begin of any 3D printing layer, the printer go out of printing plane and press an end-stop switch connected to ESP32CAM pin set as INPUT_PULLUP. Every printing layer the printer go to press the microswitch, then wait a bit of seconds that ESP32CAM finish the capture process (even switch on/off flash led before/after take a photo) then continue to print. (Using this the effect in the final video is that a 3D Printer only move slow on Z axis, no movement at all in X and Y axis because when a printer press the switch it is always in the same (XY) position.
I would suggest you to not use FS name to point a FrameSize in the code, this is confusing with FS (FileSystem), maybe cannot be a problem in the code but is a bit confusing for peoples like me. :p

PS: I wrote an sketch that show ESP32CAM video (in realtime) on an very small color oled based on SSD1331 chip. Because the oled have low resolution (96x64) I capture the frame as smaller possible (so even I've an high framerate), if I remember 160x120, then just remove odd pixels (in X and Y) from the frame array, so the final image to show on the oled is 80x60. The video is shown, at high framerate, not very clear video, a lot of spurious pixels, but I've read that it is best to use the camera.h converters after capturing a jpeg image insteant of capture a raw bitmap image. I will refactor it for best quality image. My goal is to use it to make a network video call between 2 ESPs in a small form, with I2S audio too, for this purpose I wrote mine ESPAudioClass compatible with ESP8266 and ESP32.
 
Last edited:
My goal is to use it to make a network video call between 2 ESPs in a small form, with I2S audio too, for this purpose I wrote mine ESPAudioClass compatible with ESP8266 and ESP32.

Dear max123,

I hope you would share some code samples of "ESPAudioClass" with people. I am curious how it works video & audio. Thanks.
 

max123

Well-Known Member
Licensed User
Longtime User
I'm glad you like it.... Yes I will share that, but it is C++ code only and probably not the right place to share here on this forum, even it depends on many libraries I have developed and import inside the sketches.

To show a camera video on oled this is an experiment I wanted to see my face in realtime on small oled :D by ESP32CAM, maybe you refer other my posts where I explain that my oled library can show videos I download from Youtube, where I (for now) manually extract with FFMPEG all frames in the video (and resize to 96 pixels width mantaining the ratio), then extract 44100 16bit Stereo audio to wav file.

This is a long story...

I've created two GUI encoders with B4J, one manage Bitmap images, other manage Jpeg images, they able to load all image frames, and encodes in a format that microcontroller (ESP in this case) can read as fast possible from uSD. The final format will be .rvb (raw video bitmap) or .rvj (raw video jpeg) depending on the encoder used.

The encoder app use BitmapCreator, while encode the videos show an anteprima on a Canvas at real size (pixels)(supported up 320x240).

It is even possible to select the color output format like RGB565 (16bit), RGB666 (18bit), RGB888 (24bit), Black And White (2bit)(BW no yet works, just need a treshold, RGB values bigger than this are black, others are white). This is for compatibility with no color oleds like SSD1306.

Finally for my Oled library I wrote a class that can read both formats, it is a raw video class where the end user can just select a video file from SD and play it, or it can use a raw mode, so just you pass the frame number and it will show on screen the exact frame, with this you can play video back, rewind, forward etc... you can even just use a For loop to cyclic some frames and more.

On final part I used it in conjuntion with my ESPAudioClass that out the audio to the external audio DAC, I use a PCM5102A that is on top of a small Pimoroni Raspberry Zero audio DAC (I even use on Raspberry Zero W), I've adapted it on breadboard with a T Raspberry breadboard adapter, and wired it to ESP I2S out pins.

On the end the final sketch read from uSD both video and audio files, without audio playback a video go up 140 FPS (wich looks real and impressive fps), with audio the max I can get is 24-25 fps that is original Youtube video framerate. I can see films :D :D
It can be improved, at least I need to obtain 30 fps, on oled side I think is pretty impossible, it already use all oled hardware acceleration and fast SPI bus speed up 50Mhz (on breadboard but with very short wires) the problem here is that two files are open and SPI bus is not concurrent, one time read audio, on time read wav file, one time read video.... and so..... probably if I put the audio inside a video file it is faster.... but the way I use now permits to exchange videos and audio, so eg I can play a video with an audio of another video, or just any .wav file.

This worked with a 3.5 minijack audio to amplifier or directly connect headphones, the audio quality is same as audio CD.

I even tried this with two small MAX98357A and two small but hi quality speakers each with bass, middle and tweeter, the audio is very good, just I had a problem with a resistor to select LR channels... and so I really can see some small films, 20-30-50-60 minutes without interruption, with audio out of DAC and 65535 colors video as small as a coin with a really wide angle view, vidid colors, no retroillumination, black is really black, no dark grey.

Note that I even tried this on SSD1331 128x128 oled. Next I will try with biggers oleds, I even ported the library for 320x240 ILI9340 touch display, here a video of 320x180 I get max 12 FPS without audio..... need datasheet on the hand an hw optimization. I've managed to get a touchscreen video player with START, PAUSE, STOP, REWIND, FORWARD, but is a working progress..... at 12 fps is not good.

I had problems to place too big files on SD and this is a limit I have to inverstigate.....

The next step is to avoid to extract manually with FFMPEG video frames and audio and do it directly inside the encoder apps, so do not load images, but directly an mp4 video (from youtube or other place) with audio and the encoder (using jShell and FFMPEG) will extract audio and video and package inside a .rvb or .rvj formats ESP can read from uSD or flash memory.

Because two different formats ?

Because RVB use bitmaps, without compression, RVJ instead use Jpeg and so FFMPEG apply a compression, this produce a very small video file (like 1/8 of RVB with default compression) and on a small oled the final visual result is the same.

The problem with RVB is that not every frame have the same size, so I indicized the frames inside a file and when read back on ESP, the file will continue to skip backward forward and skip is slow, so at end even if file (and every image) is small I have a lower fps than using bitmap.... it is a bit complex to explain.

These days I've no time to dedicate on this, but next I will continue my work.

Maybe if you are good on B4R next you can try to port it if you interested, I started to convert Oled library when not already optimized, but I had some problems I cannot solve. The ESPAudioClass even is not yet finished, but it is working on external audio DAC. Note that both libraries are adapted to work with ESP8266 and ESP32, as all other my libraries I originally started for ESP8266 and even adapted to work with both.

Stay tuned !
 
Last edited:
Dear max123,
Thanks for detailed explanation and hard work, really appreciated. You are more expert that most of us so we wish you good luck to make some useful to be beneficial for us. Thanks a lot... waiting your success.
 

max123

Well-Known Member
Licensed User
Longtime User
I'm not an expert, I just do no wait other users write code for me and do it and test myself.
 

KMatle

Expert
Licensed User
Longtime User
Old threat but good to know: I wondered why my module did not work properly (stream was distorted or didn't work at all). Solution was that the WiFi signal is very weak. Putting my finger on the end of the antenna did the trick. Using an external antenna should solve this.
 

max123

Well-Known Member
Licensed User
Longtime User
Your body acts as antenna. I've read some peoples intentionally put some metallic parts near ESP antenna, that acts as addictional antenna like if you put a finger.
But best solution is to have a mini IPEX antenna connector and connect to a real antenna., but not all modules mount this.
 

max123

Well-Known Member
Licensed User
Longtime User
Old threat but good to know: I wondered why my module did not work properly (stream was distorted or didn't work at all). Solution was that the WiFi signal is very weak. Putting my finger on the end of the antenna did the trick. Using an external antenna should solve this.
But I never had this problem, my video stream is fluid, just it have a framerate depending on the actual resolution, with 640x480 I've near 30-35 fps, with 800x600 near 20-25 fps, with 1600x1200 near 5-10 fps. But without lags. I've more ESP32CAM and all works without lags and image distortion. All these are AIThinker or clones, is difficult to know. Probably you have some mistake with your camera. I even show the frame buffer on a small color oled, not super just I've some noise I need to remove.
 

BertI

Member
Licensed User
Longtime User
Old threat but good to know: I wondered why my module did not work properly (stream was distorted or didn't work at all). Solution was that the WiFi signal is very weak. Putting my finger on the end of the antenna did the trick. Using an external antenna should solve this.
I experienced this issue with the ESP32CAM some time ago when I first had a go at using it. I'm not convinced that this is due to a weak signal as my module was within a meter of the router. If anything, I wondered whether it was detuning that was actually helping. I can't remember finding a reliable solution but perhaps, if your module was close to the router when you were testing, try placing it at some distance and see if that has any effect. The camera image itself also suffered from interference manifested as the occasional streak. I can only assume that this might be due to supply regulation quality as there must be quite horrendous spikes when RF gets transmitted. Possibly why it works better via the 5V supply as there is a relatively fast reacting regulator before the device. Could also try increasing/improving capacitors closer to the ESP32 but haven't tried. Perhaps I'll have to resurrect this project at some point...
 

max123

Well-Known Member
Licensed User
Longtime User
Yes, try to put a 10uf capacitor from VCC to GND, it help reducing spikes, expecially when WiFi is used at same time with flash led. I found that power it with 3.3v is not good, better to use 5v with its internal regulator that probably is more than 500ma of a simple USB connection. Using 3.3v I see some green and yellow lines appears in the frame buffer.
 
Last edited:

BertI

Member
Licensed User
Longtime User
Took a long time to resurrect this project, but from some posts I've seen elsewhere it would seem that the symptom of faster frame rates when you touch or are in close proximity to the board are more to do with interference from the Xclk signal being put out on GPIO0 - maybe getting picked up by something and causing hiccups. This clocking signal is set to 20MHz in the inline C code of the ESP32CAM module but if you try 8MHz
C:
 config.xclk_freq_hz = 8000000;
then that looks to work (on my board anyway). Probably reduces the rate at which pixel data is read but possibly this will mainly be of concern when you are trying to use highest resolutions at highest frame rates. Could experiment with higher frequencies until you encounter the problem. I've also seen some hardware related mods to mitigate the interference but haven't tried as module not so easily accessible.
 
Top