Please follow the installation (and configuration) instructions if you have not done it yet:
http://www.b4x.com/android/downloads.html
In this tutorial we will create a new AVD (Android Virtual Device) which is an emulator instance. Then we will create a simple program that displays a simple message box and also writes a message to the log.
You can also connect a real device to the IDE:
Connecting your device with B4A-Bridge
Common issues are listed at the end of this post. If you encounter an error that is not listed or that you are unable to solve, please contact [email protected]
Create new AVD
- Run Basic4android.
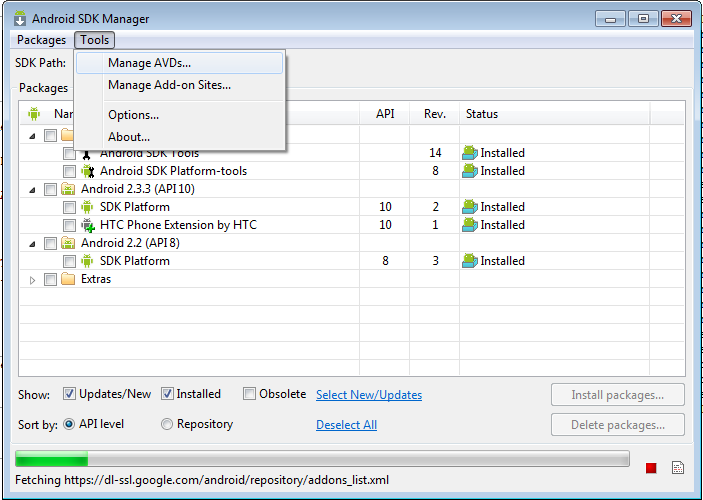
- Choose Tools Menu - Run AVD Manager.
Wait a few seconds.
- The SDK Manager may appear depending on the version and configuration. You should choose Tools - Manage AVDs.
- The AVD Manager should appear:
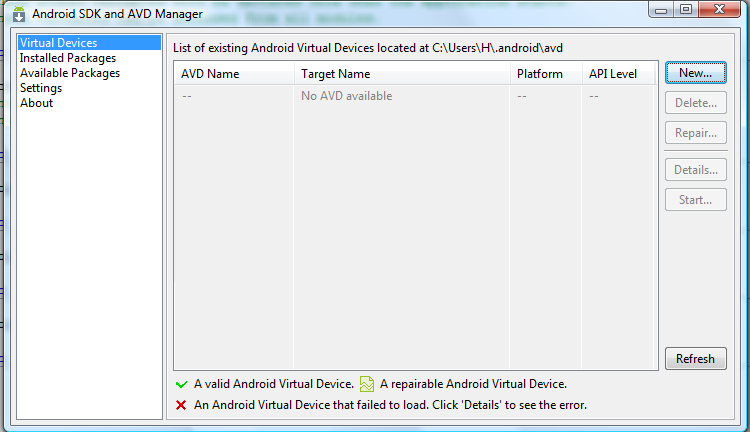
- Choose New and fill the fields similar to the following image (it is recommended to choose HVGA) :
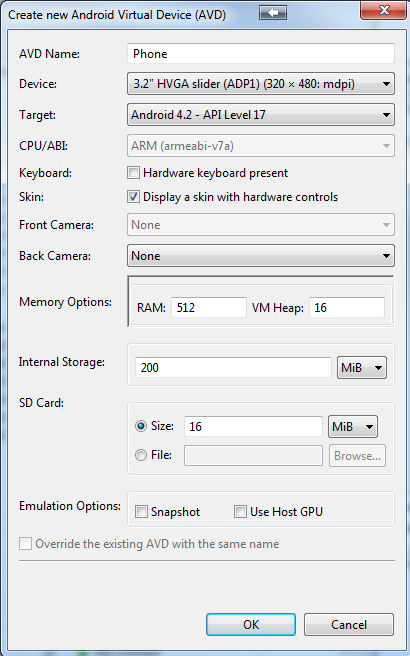
- Press on Create AVD.
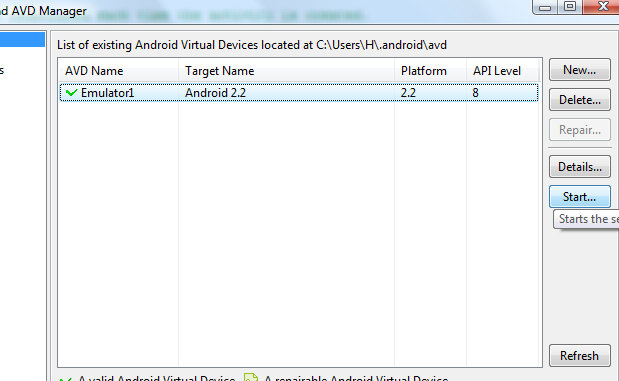
- Note that you can create more than one AVD. Each can have a different resolution or can target a different API version (you will need to install additional platforms first).
- Now press Start in order to start the emulator
- You will see several windows popping up and disappearing. This is fine.
- The emulator should boot up:
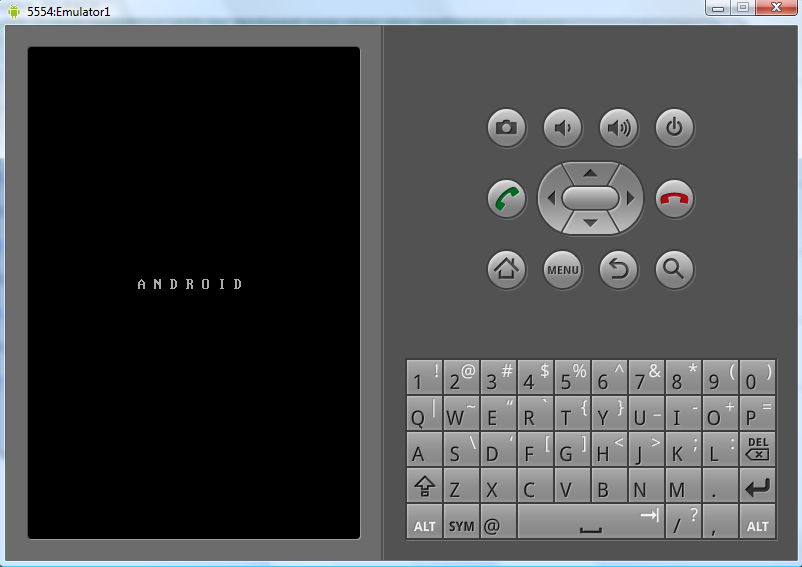
Wait... on the first time it can take several minutes till the emulator is ready.
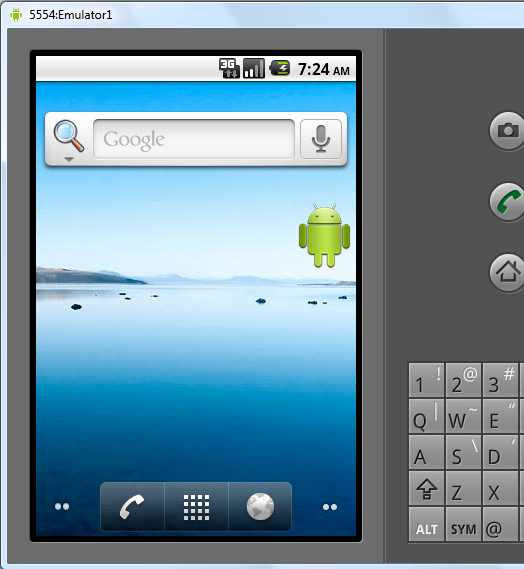
The emulator is ready when it gets to this screen:
You may see this screen, which is the lock screen, instead:
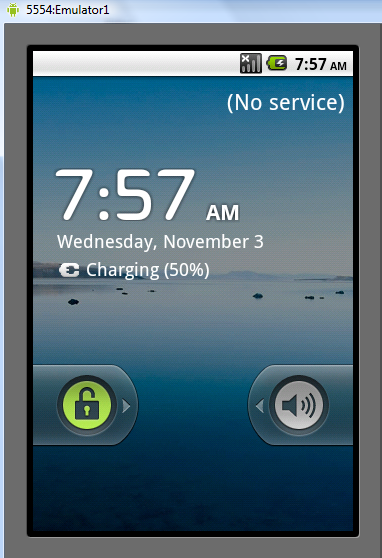
Drag the lock icon to the right to unlock the device.
Note that there is no need to restart the emulator each time you deploy a program. The emulator can be kept running all the time.
If you are not familiar with Android you can play with the emulator. Press on the button with the small squares to get to the application page.
Troubleshooting: If you get an error message similar to:
invalid command-line parameter: Files\Android\android-sdk\tools/emulator-arm.exe.
Hint: use '@foo' to launch a virtual device named 'foo'.
Then you should reinstall Android SDK in a path without spaces, such as c:\android.
Writing your first Basic4android program
- As this is a new program we should first set its location by choosing File - Save.
It is highly recommended to save each project in its own folder.
- Create a new folder: "Hello world", open the folder and save the program as "Hello world".
- Write the following code under Sub Activity_Create:
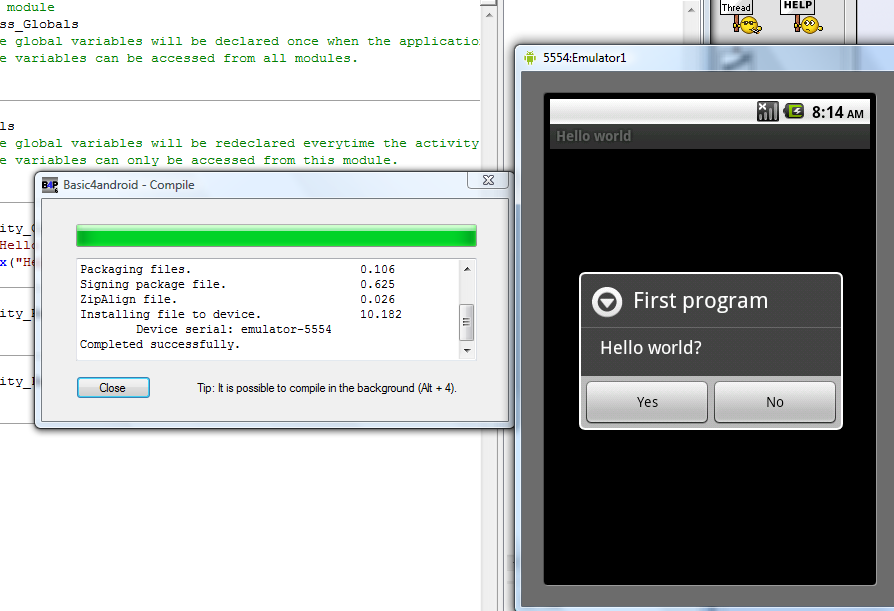
- Press F5 to compile and deploy your program to the emulator.
The package dialog should appear (empty):
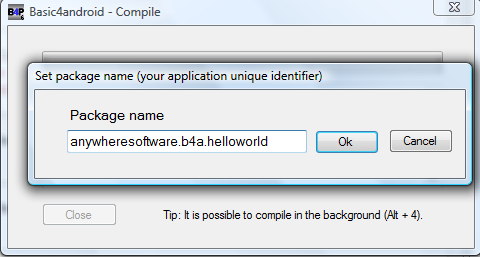
Each Android application is identified by a unique package string.
This is a string built of several parts separated with periods.
The string should include at least two parts. You cannot install two applications with the same package on one device.
Note that you can always change the package name (and the label) under tools menu.
- Enter a package name.
- Next you will be asked to enter the application "label". This is the application name that the user will see.
Your program will now be compiled and installed to the emulator:
The emulator is significantly slower than a real device.
In many cases it is more convenient to work with a real device as the installation is much faster.
Note that you can always redeploy your program. There is no need to close the running program on the emulator.
Tracking the log with LogCat
Android devices keep an internal buffer of log messages. These messages can be very handy for debugging.
To view the logs you should switch to the Logs tab in the right pane and press connect:
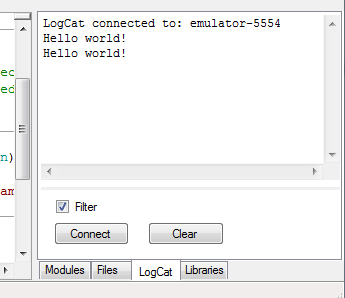
There are two "Hello world!" messages in the screenshot as I ran the program twice.
Unchecking "Filter" will show all available messages (not just messages relevant to your program).
Hello world")
Common issues
- "emulator: ERROR: no search paths found in this AVD's configuration
weird, the AVD's config.ini file is malformed. Try re-creating it."
This error happens when you have non-ASCII characters in your Windows user name. Android SDK fails to find the proper path.
The solution is to create a folder named: c:\android
And to add an environment variable named ANDROID_SDK_HOME with the value of c:\android.
- "invalid command-line parameter: Files\Android\android-sdk\tools/emulator-arm.exe.
Hint: use '@foo' to launch a virtual device named 'foo'." This error sometimes happen when you install Android SDK in a path with spaces. Copy the SDK to C:\Android and update the paths configuration to solve it.
http://www.b4x.com/android/downloads.html
In this tutorial we will create a new AVD (Android Virtual Device) which is an emulator instance. Then we will create a simple program that displays a simple message box and also writes a message to the log.
You can also connect a real device to the IDE:
Connecting your device with B4A-Bridge
Common issues are listed at the end of this post. If you encounter an error that is not listed or that you are unable to solve, please contact [email protected]
Create new AVD
- Run Basic4android.
- Choose Tools Menu - Run AVD Manager.
Wait a few seconds.
- The SDK Manager may appear depending on the version and configuration. You should choose Tools - Manage AVDs.
- The AVD Manager should appear:
- Choose New and fill the fields similar to the following image (it is recommended to choose HVGA) :
- Press on Create AVD.
- Note that you can create more than one AVD. Each can have a different resolution or can target a different API version (you will need to install additional platforms first).
- Now press Start in order to start the emulator
- You will see several windows popping up and disappearing. This is fine.
- The emulator should boot up:
Wait... on the first time it can take several minutes till the emulator is ready.
The emulator is ready when it gets to this screen:
You may see this screen, which is the lock screen, instead:
Drag the lock icon to the right to unlock the device.
Note that there is no need to restart the emulator each time you deploy a program. The emulator can be kept running all the time.
If you are not familiar with Android you can play with the emulator. Press on the button with the small squares to get to the application page.
Troubleshooting: If you get an error message similar to:
invalid command-line parameter: Files\Android\android-sdk\tools/emulator-arm.exe.
Hint: use '@foo' to launch a virtual device named 'foo'.
Then you should reinstall Android SDK in a path without spaces, such as c:\android.
Writing your first Basic4android program
- As this is a new program we should first set its location by choosing File - Save.
It is highly recommended to save each project in its own folder.
- Create a new folder: "Hello world", open the folder and save the program as "Hello world".
- Write the following code under Sub Activity_Create:
B4X:
Sub Activity_Create(FirstTime As Boolean)
    Log("Hello world!")
    Msgbox("Hello world?", "First program")
End SubThe package dialog should appear (empty):
Each Android application is identified by a unique package string.
This is a string built of several parts separated with periods.
The string should include at least two parts. You cannot install two applications with the same package on one device.
Note that you can always change the package name (and the label) under tools menu.
- Enter a package name.
- Next you will be asked to enter the application "label". This is the application name that the user will see.
Your program will now be compiled and installed to the emulator:
The emulator is significantly slower than a real device.
In many cases it is more convenient to work with a real device as the installation is much faster.
Note that you can always redeploy your program. There is no need to close the running program on the emulator.
Tracking the log with LogCat
Android devices keep an internal buffer of log messages. These messages can be very handy for debugging.
To view the logs you should switch to the Logs tab in the right pane and press connect:
There are two "Hello world!" messages in the screenshot as I ran the program twice.
Unchecking "Filter" will show all available messages (not just messages relevant to your program).
Hello world
Common issues
- "emulator: ERROR: no search paths found in this AVD's configuration
weird, the AVD's config.ini file is malformed. Try re-creating it."
This error happens when you have non-ASCII characters in your Windows user name. Android SDK fails to find the proper path.
The solution is to create a folder named: c:\android
And to add an environment variable named ANDROID_SDK_HOME with the value of c:\android.
- "invalid command-line parameter: Files\Android\android-sdk\tools/emulator-arm.exe.
Hint: use '@foo' to launch a virtual device named 'foo'." This error sometimes happen when you install Android SDK in a path with spaces. Copy the SDK to C:\Android and update the paths configuration to solve it.