*** Contents ***
Intro
Acknowledgements
Disclaimer
Environment
Conventions used in this post
Making it work
Compiling and running your programs
A semi-automated way to get your B4J UI programs ready
Android SDK Manager
Useful tips
*** Intro ***
Ever since the arrival of Windows 10 and all its 'telemetry' (<cough>spyware</cough>) I've been considering leaving Windows behind and moving to Linux. Being a more or less complete newbie to Linux, it had to wait until I had time to start doing this in a proper way: I'm a hands-on guy, I don't want to study for months and only then start using the acquired (and meanwhile probably forgotten) knowledge. In other words, dive in at the deep end and start swimming.
In this post I've documented the steps I took for both B4A and B4J as it seemed better to keep all of it in one place.
Last but not least, I didn't want the overhead of a Windows virtual machine with e.g. VirtualBox.
*** Acknowledgements ***
- Many thanks to @Mihai Rainer Jr. whose thread was absolutely crucial for me as a starting point and on which this one is 99% based: https://www.b4x.com/android/forum/t...under-linux-with-wine-fully-functional.98431/.
- And also many thanks to @EnriqueGonzalez for providing adb version 1.0.40 for Windows and Linux (more about this below).
*** Disclaimer ***
As I mentioned, Linux is mostly a new planet for me. If you would ask questions in this here thread and I happen to know the answer, I'll gladly provide it. However, I won't be searching the web to get those answers - you can do that as well and I want to spend my time digging deep into the Linuxverse") Many steps have been copied from @Mihai Rainer Jr.'s thread and at the moment I might not even know/understand why they're needed; all I can say is: it works here.
Many steps have been copied from @Mihai Rainer Jr.'s thread and at the moment I might not even know/understand why they're needed; all I can say is: it works here.
*** Environment ***
- B4J v9.10 through v9.50 (the former is 32-bit, the latter is 64-bit)
- B4A v11.0 through v11.50
- Linux Mint 20.2 Cinnamon (64 bit); installed from a Live USB stick, all default values used
- Wine 5.0 (Ubuntu 5.0-3ubuntu1) (64 bit)
- Laptop: 8 Gb, AMD Ryzen 3 2200U with Radeon Vega Mobile Gfx (in section 'Useful tips' there is a note about the Ryzen processors)
- Desktop: 16 Gb, AMD FX-6300 Six-Core Processor 3.50 GHz
*** Conventions used in this post ***
- Steps that are intended for one particular platform only are prefixed with [B4A] c.q. [B4J]; all others are applicable for both products.
- Wherever 'YOUR_USER_NAME' is used in paths, replace it with your user name (duh, really).
*** Making it work ***
1. Open a terminal window and enter the following commands:
Warning: @fgh3966 experienced a bug with Wine 8.0.0 and had to revert to version 7.0.1 (https://www.b4x.com/android/forum/threads/bug-wine-8-0-0-maj.145801/)
2. Download the 'dotnet 4.5.2 redistributable (offline version)' (at the time of writing it could be obtained at https://www.microsoft.com/en-us/download/details.aspx?id=42642 ; search the web if the location would have changed).
3.
- Select 'Select the default wine prefix' and click 'OK'
- Select 'Run winecfg' and click 'OK'
- In tab 'Applications', make sure 'Windows Version' (at the bottom) says 'Windows 7'; if you had to change it, click 'Apply' - thanks to @rwblinn for this tip
- In tab 'Graphics', select a 'Screen resolution' of 100 or more, then click 'OK'
- Select 'Install a Windows DLL or component' and click 'OK'
- Check the boxes for 'dotnet452' and 'vcrun2010', then click 'OK'; click 'OK' (or 'Continue' where applicable) in all the warning messages that pop up, and wait for the installations to complete
- A message will pop up stating you must restart your computer; click 'Restart Now' as this will only terminate Wine
If you would get an error message about the package being broken, winetricks will terminate. In that case, do this:
4.
- Select 'Select the default wine prefix' and click 'OK'
- Select 'Run winecfg' and click 'OK'; in tab 'Applications', make sure 'Windows Version' (at the bottom) says 'Windows 7' (because the Wine built-in dotnet installer switches this to 'Windows 2003'), click 'OK'
- Select 'Run uninstaller', click 'OK', then click the 'Install' button in that window; navigate to your 'Downloads' directory (or wherever you saved the downloaded 'dotnet 4.5.2 redistributable (offline version)'), change 'Files of type' at the bottom to 'All files (*.*)', select the downloadeded installer, click 'Open', select 'Repair .NET Framework 4.5.2 to its original state', click 'Next', click 'OK' (or 'Continue' where applicable) in all the warning messages that pop up, and wait for the installation to complete
- Close all windows by clicking 'OK' (and 'Cancel' in the very last window)
5. Restart the Wine Prefix (important: under your user, not root!):
6. Download B4A and/or B4J and their required components (Android SDK, JDK, ...) from https://www.b4x.com.
7.
8. Extract (e.g. via 'Files', the file manager) the jdk you downloaded from the B4X site to /home/YOUR_USER_NAME/virtualwinedrives/b4x64/drive_c/java so that directory /home/YOUR_USER_NAME/virtualwinedrives/b4x64/drive_c/java/jdk-11.0.1 exists.
9.
- Select 'Select the default wine prefix' and click 'OK'
- Select 'Run uninstaller', click 'OK', and click the 'Install' button
- Change 'Files of type' at the bottom to 'All files (*.*)', select B4A.exe, click 'Open', and install B4A; during installation, check the box to create a desktop icon
- Change 'Files of type' at the bottom to 'All files (*.*)', select B4J.exe, click 'Open', and install B4J; during installation, check the box to create a desktop icon
- Click 'OK' to close the 'Add/Remove Programs' window
- Select 'Change settings' and click 'OK'; check the checkboxes in front of these ones and then click 'OK':
ddr=gdi (this one may be absent from the list, which doesn't seem to be a problem)
glsl=enabled
orm=fbo
videomemorysize=512
- Click 'OK'; also dismiss the warning messages that pop up
- Click 'OK', and then in the main Winetricks window click 'Cancel' to close Winetricks
10. Now could be a good time to copy the relevant folders with your B4X projects, additional libraries, and shared modules from your Windows environment. If you copy them to your '/home/YOUR_USER_NAME/Documents' directory, you'll find them in 'My Documents' under Wine, e.g. when opening a project in B4X.
11. [B4A]
12. [B4A] Extract (e.g. via 'Files', the file manager) the Android SDK tools you downloaded from the B4X site (at the time of writing, this was 'commandlinetools-win-6609375_latest.zip') to /home/YOUR_USER_NAME/virtualwinedrives/b4x64/drive_c/android so that directory /home/YOUR_USER_NAME/virtualwinedrives/b4x64/drive_c/android/cmdline-tools exists.
13. [B4A] Extract (e.g. via 'Files', the file manager) the Android Resources you downloaded from the B4X site (at the time of writing, this was 'resources_06_21.zip') to /home/YOUR_USER_NAME/virtualwinedrives/b4x64/drive_c/android so that several new directories now exist in that directory.
14. Starting B4A and B4J can be done by double-clicking the desktop icons. An alternative way to run e.g. B4A is (B4J is of course similar):
NOTE: the default installation folder for the 64-bit versions of B4A and B4J is 'Program Files' while the 32-bit versions use 'Program Files (x86)'. Modify the aforementioned path as appropriate, if applicable.
15. Run B4A and B4J (by double-clicking the desktop icon) and configure the paths via Tools->'Configure Paths' in both; in B4A, the SDK Manager will not work but - as mentioned on the B4X site - you don't need it. If for some reason you would want/need it, see section 'Android SDK Manager' below. If you used the paths from this post, you can copy and paste the following information for the first two:
- javac.exe: C:\java\jdk-11.0.1\bin\javac.exe
- android.jar (for SDK level 30): C:\android\platforms\android-30\android.jar
- Additional Libraries: that's a custom one from you
- Shared Modules: that's a custom one from you
16. [B4A] In B4A, don't forget to set/load your Private Sign Key (from the 'Tools' menu). Failing to do so, you won't be able to install existing apps on your devices as for Android they will appear to come from a different creator.
17. [B4A] NOTE: when connecting B4A Bridge, a message pops up stating 'Ping failed (IP = xxx.xxx.xxx.xxx): The IP address is most probably incorrect. Do you want to use it?'; click 'Yes', it won't stop you from connecting to your Android device.
18. NOTE: Designer works fine in both B4A and B4J, but the WYSIWYG Designer window is completely black (apart from the title bar).
19. [B4A] adb must be version 1.0.40 for both Windows (for Wine) and Linux (platform tools 28.0.2); you can check this with
You can download both versions in one zip file from https://www.dropbox.com/sh/a45a6ym8l1ue5fk/AAB-7ocL5O4kSvT7cChZB5LEa?dl=0 (thank you @EnriqueGonzalez). In a next step, I will explain what to do with the downloaded file.
20. [B4J]
21. [B4J] Download B4JPackager11 from https://www.b4x.com/android/forum/t...the-simplest-way-to-distribute-ui-apps.99835/, compile it, and copy file 'B4JPackager11.jar' from the project's Objects folder to Linux directory /home/YOUR_USER_NAME/B4X.
22. [B4J]
Download and unzip https://b4xfiles-4c17.kxcdn.com/b4j/linux_jdk-11.0.1.zip as per https://www.b4x.com/android/forum/threads/b4jpackager11-the-simplest-way-to-distribute-ui-apps.99835 and extract (e.g. via 'Files', the file manager) its contents to /home/YOUR_USER_NAME/java so that directory 'jdk-11.0.1' now exists in that directory.
23. [B4A]
24. [B4A] Extract (e.g. via 'Files', the file manager) the Windows adb 1.0.40 (platform-tools_r28.0.2-windows.zip) you downloaded from the Dropbox link to /home/YOUR_USER_NAME/virtualwinedrives/b4x64/drive_c/android/platform-tools so that several new directories now exist in that directory.
25. [B4A] Extract (e.g. via 'Files', the file manager) the Linux adb 1.0.40 (platform-tools_r28.0.2-linux.zip) you downloaded from the Dropbox link to /home/YOUR_USER_NAME/B4X/platform-tools so that several new directories now exist in that directory.
26. [B4A]
- Launch the text editor (click the Linux Mint menu button in the bottom left corner, type 'text' in the search box, click 'Text Editor')
- Right-click in the large pane on the right and click 'Show Hidden Files' if it's not already checked
- Navigate to 'Home'
- Double-click file '.bashrc' and add the following lines:
- Save the file
27. [B4J]
- Launch the text editor (click the Linux Mint menu button in the bottom left corner, type 'text' in the search box, click 'Text Editor')
- Right-click in the large pane on the right and click 'Show Hidden Files' if it's not already checked
- Navigate to 'Home'
- Double-click file '.bashrc' and add the following lines:
- Save the file
28. - Launch the text editor (click the Linux Mint menu button in the bottom left corner, type 'text' in the search box, click 'Text Editor')
- Right-click in the large pane on the right and click 'Show Hidden Files' if it's not already checked
- Navigate to 'Home'
- Double-click file '.bashrc' and add the following lines:
- Save the file
29. Log out, and log in again to make sure the updated .bashrc information will be available to all processes. (Possibly a
command will take care of this too, but I'm not sure - Linux newbie here as I mentioned)
30. [B4A] Check if adb is working (USB debugging must have been enabled in the Developer Options of the Android device):
- Connect your Android phone to the computer via USB
- In a Terminal window, type
- adb should then report something like:
- In case an issue comes up, use commands 'adb kill-server' and 'adb start-server', and then retry 'adb devices'
31. [B4J] If you intend to use InnoSetup to produce single-file installers for your B4J programs, download it from https://jrsoftware.org/isinfo.php and install it with
(use the appropriate filename).
That's it. You should now be able to use B4A and B4J on Linux! Make sure you read the 'Useful tips' section below; it may save you a lot of time if strange things (don't) seem to be happening.
*** Compiling and running your programs ***
B4A:
Business as usual, run the IDE, connect to your device with B4A Bridge (ignore the 'can't ping' warning) and do your thing.
B4J - non-UI programs:
Run the IDE, compile your program, use the jar file; nothing additional needs to be done.
B4J - UI programs - running on a system that has Java installed (assuming you installed Java under /home/YOUR_USER_NAME/java/jdk-11.0.1):
B4J - UI programs packaged to run on a system that doesn't have Java installed (some steps can be done differently - this is how I do it; also see 'A semi-automated way to get your B4J UI programs ready' below for an easier way to do this):
1. From the IDE, use option Project->'Build Standalone Package'; now, the Windows version is ready and a 'packager.json' file has been created
2.
3. If, as suggested before, you put your B4X projects under your Documents directory, you'll find the project folder and its subfolders there
4. From the project's Objects folder, copy the jar file and 'packager.json' to /home/YOUR_USER_NAME/B4Jprograms/YOUR_PROJECT_NAME
5. Edit packager.json as appropriate; you may need to adjust values such as the path to the icon file
6.
7. A new directory 'temp' is created which contains directory 'build' which contains file 'run.command'
8. To start the program, do this:
*** A semi-automated way to get your B4J UI programs ready ***
This is useful to prepare programs to run on a system that doesn't have Java installed. Obviously, all this happens in the Linux environment. Two steps are involved:
A. CopyFilesForLinuxify (runs under Wine as a CustomBuildAction): prepares the necessary files for Linuxify
B. Linuxify (runs natively under Linux): packages your program and produces an executable script to launch it
A. CopyFilesForLinuxify
1. Compile the attached 'CopyFilesForLinuxify' project and copy its jar (from the project's Objects folder) to your B4J 'Additional libraries' directory.
2. You'll need a top-level directory in which subdirectories will be created that will hold your B4J projects' executables. In this section, I will assume that this directory is '/home/YOUR_USER_NAME/Documents/B4Jprograms'. CopyFilesForLinuxify will create that directory if it doesn't already exist.
3. Important: CopyFilesForLinuxify determines whether or not it is running on Linux under Wine. If not, it doesn't produce the target files (it does, however, delete the temp directory if so instructed). Environment variable 'WINEPREFIX' must be set to a non-empty string value in the Linux environment; if you followed the instructions in section 'Making it work', this will have been done.
4. Now, all you have to do is add this CustomBuildAction to your B4J UI programs (and edit it for each program):
The arguments it accepts are as follows:
- the full path of the directory mentioned in (2)
- the project's jar file name without path or extension
- Y to delete the temp folder, N to leave it alone (this is the folder that is created by B4Jpackager11)
- optionally, the path to the icon file you want to use for your project; most likely the same one that you specified for '#PackagerProperty: IconFile' if you did so
5. Finally, use Projects -> Build Standalone Package to compile your project, build the package, and prepare the necessary files for Linuxify. A new directory with the same name as your project will be created under '/home/YOUR_USER_NAME/Documents/B4Jprograms', and the project's jar and packager.json files that were created by B4Jpackager11 will have been copied to it.
B. Linuxify
I am assuming that you have used the paths (for java and B4JPackager11) that were suggested in section 'Making it work'.
Once, to prepare Linuxify for use on the target Linux system:
- Build the attached project with B4J on Windows (or on Linux under Wine): Project -> Build Standalone Package
- Folder Objects\temp can be deleted
- In folder Objects, edit packager.json and remove path information, just keep the filenames
-
- From folder Objects, copy the jar and packager.json files to Linux directory /home/YOUR_USER_NAME/Linuxify
-
- A new directory 'temp' is created - do not delete it!
-
- Edit file '.bashrc' (see e.g. step 28 in section 'Making it work'), append these lines, and log out/log in again to activate them:
- Using the text editor, create shell script /home/YOUR_USER_NAME/Linuxify/runme.sh:
- Make the shell script executable:
- Now you're ready to use Linuxify
Usage (on native Linux, i.e. not under Wine):
- Navigate to the directory to which your program's jar and packager.json' files were copied with CopyFilesForLinuxify:
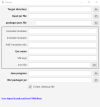
- Start Linuxify and fill out the necessary data:
- Hover the mouse over the views for tooltips
- Click the 'Process' button (it appears once all required data have been entered/selected) to produce your 'linuxified' program
- You'll be able to follow the processing in the TextArea that will appear
- When processing is completed, the 'OK' button appears; click it to hide the TextArea
- The 'Target directory' you have chosen (the default is /home/YOUR_USER_NAME/Documents/B4Jprograms/YOUR_PROGRAM'S_DIRECTORY) will now contain all the required files; cd to it and use './run.command' to start your program

*** Android SDK Manager ***
As stated on the B4X site, the SDK Manager is no longer needed. However, if you still want/need to use it, here's how to get it to work:
-
- NOTE: the default installation folder for the 64-bit versions of B4A and B4J is 'Program Files' while the 32-bit versions use 'Program Files (x86)'. Modify the aforementioned path as appropriate, if applicable.
- Now you can run the SDK Manager with these commands, NOT from within the B4A IDE (Note: sdkmanager.bat is at: C:\android\tools\bin\sdkmanager.bat):
- If you prefer a desktop icon to double-click, use Text Editor to create a file (give it extension '.desktop') in /home/YOUR_USER_NAME/Desktop with the following contents:
*** Useful tips ***
- If you don't like the IDE font under Wine, you can change it via Tools->IDE Options->Font Picker.
- Robocopy isn't available for Linux/Wine, so if the CustomBuildAction with Robocopy is present in your project, you'll have to turn it into a comment or replace it with something else. As xcopy.exe does exist in the Wine environment, these lines could be used in a B4XPages project (update the xcopy options "/..." with the ones you prefer):
- If you run across the error relating to GLXBadFBConfig when running B4A or B4J, run this in a terminal window (error detail here - thanks to @TheJinJ for this hint):
- Designer works fine in both B4A and B4J, but the WYSIWYG Designer window is completely black (apart from the title bar).
- To use B4X Localizator in a #CustomBuildAction , see this post (thank you, @Ivan Aldaz)
- [B4A] Under Wine, 'Documents' is 'My Documents' (when you use paths in e.g. #CustomBuildActions or in your code).
- [B4J] I've increased the process timeout in my B4J IDE (Tools->IDE Options->Configure Process Timeout) to 600 seconds. Use whatever value suits you best; if a compilation or standalone package build fails with 'process timed out' and you're certain that no process is hanging, increase that value.
- [B4J] If (like I have) a B4J program, running from within the IDE or externally to the IDE under Wine, apparently uses a Greek-looking font (which is actually the 'Standard Symbols' font), see here for a quick fix: https://www.b4x.com/android/forum/t...m-the-ide-uses-greek-font.148952/#post-944544
- [B4J] Msgbox text sometimes seems to be truncated after a couple of lines. I didn't find a solution to this, so here's a workaround I use when I know a long text will have to be displayed:
- As my laptop CPU is an AMD Ryzen and the system had intermittently frozen several times while running the IDE-internal B4J packager (this is an issue with Linux and the CPU, not with B4J or Java) I followed the instructions on https://easylinuxtipsproject.blogspot.com/p/bugs.html#ID27 (I could not do the first one as my BIOS config didn't seem to contain the 'PSU Idle Control' option), i.e.:
We're a couple of weeks later now, and the PC hasn't been freezing up anymore.
EDITS:
- 2024-09-15: added xcopy alternative suggestions for Robocopy in 'Useful tips'
- 2023-07-16: added a font-related tip to 'Useful tips'
- 2023-06-26: enhanced steps 3 (useful in case a certain error occurs), 9 (small change), and 12 (small change)
- 2023-02-08: added a warning about Wine 8.0.0 in section 'Making it work'
- 2022-07-06: small changes that don't affect the overall instructions
- 2022-06-26: added the 'Screen resolution' value change to step 3 (it will cause the B4J WYSIWYG Designer to be displayed properly)
- 2022-05-23: enhanced sections 'Compiling and running your programs' and 'A semi-automated way to get your B4J UI programs ready' to differentiate the B4J UI programs approach between systems that have/don't have Java installed
- 2022-05-02: added notes about the default B4X installation folders that changed with the arrival of the 64-bit versions
- 2022-03-13: added info about using B4X Localizator in a #CustomBuildAction to 'Useful tips'
- 2022-02-08: added comment about the GLXBadFBConfig error to 'Useful tips'
- 2021-11-15: added comment about Robocopy to 'Useful tips'
- 2021-09-30: added section 'A semi-automated way to get your B4J UI programs ready' and the attached projects
- 2021-09-30: in some references to file '.bashrc', the dot was omitted
- 2021-09-22: small correction in the 'MsgBoxLongText' Sub
Intro
Acknowledgements
Disclaimer
Environment
Conventions used in this post
Making it work
Compiling and running your programs
A semi-automated way to get your B4J UI programs ready
Android SDK Manager
Useful tips
*** Intro ***
Ever since the arrival of Windows 10 and all its 'telemetry' (<cough>spyware</cough>) I've been considering leaving Windows behind and moving to Linux. Being a more or less complete newbie to Linux, it had to wait until I had time to start doing this in a proper way: I'm a hands-on guy, I don't want to study for months and only then start using the acquired (and meanwhile probably forgotten) knowledge. In other words, dive in at the deep end and start swimming.
In this post I've documented the steps I took for both B4A and B4J as it seemed better to keep all of it in one place.
Last but not least, I didn't want the overhead of a Windows virtual machine with e.g. VirtualBox.
*** Acknowledgements ***
- Many thanks to @Mihai Rainer Jr. whose thread was absolutely crucial for me as a starting point and on which this one is 99% based: https://www.b4x.com/android/forum/t...under-linux-with-wine-fully-functional.98431/.
- And also many thanks to @EnriqueGonzalez for providing adb version 1.0.40 for Windows and Linux (more about this below).
*** Disclaimer ***
As I mentioned, Linux is mostly a new planet for me. If you would ask questions in this here thread and I happen to know the answer, I'll gladly provide it. However, I won't be searching the web to get those answers - you can do that as well and I want to spend my time digging deep into the Linuxverse
Many steps have been copied from @Mihai Rainer Jr.'s thread and at the moment I might not even know/understand why they're needed; all I can say is: it works here.*** Environment ***
- B4J v9.10 through v9.50 (the former is 32-bit, the latter is 64-bit)
- B4A v11.0 through v11.50
- Linux Mint 20.2 Cinnamon (64 bit); installed from a Live USB stick, all default values used
- Wine 5.0 (Ubuntu 5.0-3ubuntu1) (64 bit)
- Laptop: 8 Gb, AMD Ryzen 3 2200U with Radeon Vega Mobile Gfx (in section 'Useful tips' there is a note about the Ryzen processors)
- Desktop: 16 Gb, AMD FX-6300 Six-Core Processor 3.50 GHz
*** Conventions used in this post ***
- Steps that are intended for one particular platform only are prefixed with [B4A] c.q. [B4J]; all others are applicable for both products.
- Wherever 'YOUR_USER_NAME' is used in paths, replace it with your user name (duh, really).
*** Making it work ***
1. Open a terminal window and enter the following commands:
B4X:
sudo apt-get update && sudo apt-get upgrade
sudo apt-get install wine64 winetricks
cd
mkdir virtualwinedrives
mkdir virtualwinedrives/b4x64
WINEPREFIX="/home/YOUR_USER_NAME/virtualwinedrives/b4x64" WINEARCH=win64 wine wineboot
Warning: @fgh3966 experienced a bug with Wine 8.0.0 and had to revert to version 7.0.1 (https://www.b4x.com/android/forum/threads/bug-wine-8-0-0-maj.145801/)
2. Download the 'dotnet 4.5.2 redistributable (offline version)' (at the time of writing it could be obtained at https://www.microsoft.com/en-us/download/details.aspx?id=42642 ; search the web if the location would have changed).
3.
B4X:
WINEPREFIX="/home/YOUR_USER_NAME/virtualwinedrives/b4x64" winetricks- Select 'Run winecfg' and click 'OK'
- In tab 'Applications', make sure 'Windows Version' (at the bottom) says 'Windows 7'; if you had to change it, click 'Apply' - thanks to @rwblinn for this tip
- In tab 'Graphics', select a 'Screen resolution' of 100 or more, then click 'OK'
- Select 'Install a Windows DLL or component' and click 'OK'
- Check the boxes for 'dotnet452' and 'vcrun2010', then click 'OK'; click 'OK' (or 'Continue' where applicable) in all the warning messages that pop up, and wait for the installations to complete
- A message will pop up stating you must restart your computer; click 'Restart Now' as this will only terminate Wine
If you would get an error message about the package being broken, winetricks will terminate. In that case, do this:
B4X:
winetricks --force dotnet452
winetricks --force vcrun2010
4.
B4X:
WINEPREFIX="/home/YOUR_USER_NAME/virtualwinedrives/b4x64" winetricks- Select 'Run winecfg' and click 'OK'; in tab 'Applications', make sure 'Windows Version' (at the bottom) says 'Windows 7' (because the Wine built-in dotnet installer switches this to 'Windows 2003'), click 'OK'
- Select 'Run uninstaller', click 'OK', then click the 'Install' button in that window; navigate to your 'Downloads' directory (or wherever you saved the downloaded 'dotnet 4.5.2 redistributable (offline version)'), change 'Files of type' at the bottom to 'All files (*.*)', select the downloadeded installer, click 'Open', select 'Repair .NET Framework 4.5.2 to its original state', click 'Next', click 'OK' (or 'Continue' where applicable) in all the warning messages that pop up, and wait for the installation to complete
- Close all windows by clicking 'OK' (and 'Cancel' in the very last window)
5. Restart the Wine Prefix (important: under your user, not root!):
B4X:
WINEPREFIX="/home/YOUR_USER_NAME/virtualwinedrives/b4x64" wineboot --restart6. Download B4A and/or B4J and their required components (Android SDK, JDK, ...) from https://www.b4x.com.
7.
B4X:
mkdir /home/YOUR_USER_NAME/virtualwinedrives/b4x64/drive_c/java8. Extract (e.g. via 'Files', the file manager) the jdk you downloaded from the B4X site to /home/YOUR_USER_NAME/virtualwinedrives/b4x64/drive_c/java so that directory /home/YOUR_USER_NAME/virtualwinedrives/b4x64/drive_c/java/jdk-11.0.1 exists.
9.
B4X:
WINEPREFIX="/home/YOUR_USER_NAME/virtualwinedrives/b4x64" winetricks- Select 'Run uninstaller', click 'OK', and click the 'Install' button
- Change 'Files of type' at the bottom to 'All files (*.*)', select B4A.exe, click 'Open', and install B4A; during installation, check the box to create a desktop icon
- Change 'Files of type' at the bottom to 'All files (*.*)', select B4J.exe, click 'Open', and install B4J; during installation, check the box to create a desktop icon
- Click 'OK' to close the 'Add/Remove Programs' window
- Select 'Change settings' and click 'OK'; check the checkboxes in front of these ones and then click 'OK':
ddr=gdi (this one may be absent from the list, which doesn't seem to be a problem)
glsl=enabled
orm=fbo
videomemorysize=512
- Click 'OK'; also dismiss the warning messages that pop up
- Click 'OK', and then in the main Winetricks window click 'Cancel' to close Winetricks
10. Now could be a good time to copy the relevant folders with your B4X projects, additional libraries, and shared modules from your Windows environment. If you copy them to your '/home/YOUR_USER_NAME/Documents' directory, you'll find them in 'My Documents' under Wine, e.g. when opening a project in B4X.
11. [B4A]
B4X:
mkdir /home/YOUR_USER_NAME/virtualwinedrives/b4x64/drive_c/android12. [B4A] Extract (e.g. via 'Files', the file manager) the Android SDK tools you downloaded from the B4X site (at the time of writing, this was 'commandlinetools-win-6609375_latest.zip') to /home/YOUR_USER_NAME/virtualwinedrives/b4x64/drive_c/android so that directory /home/YOUR_USER_NAME/virtualwinedrives/b4x64/drive_c/android/cmdline-tools exists.
13. [B4A] Extract (e.g. via 'Files', the file manager) the Android Resources you downloaded from the B4X site (at the time of writing, this was 'resources_06_21.zip') to /home/YOUR_USER_NAME/virtualwinedrives/b4x64/drive_c/android so that several new directories now exist in that directory.
14. Starting B4A and B4J can be done by double-clicking the desktop icons. An alternative way to run e.g. B4A is (B4J is of course similar):
B4X:
cd '/home/YOUR_USER_NAME/virtualwinedrives/b4x64/drive_c/Program Files (x86)/Anywhere Software/Basic4android'
WINEPREFIX="/home/YOUR_USER_NAME/virtualwinedrives/b4x64" wine ./B4A.exe
NOTE: the default installation folder for the 64-bit versions of B4A and B4J is 'Program Files' while the 32-bit versions use 'Program Files (x86)'. Modify the aforementioned path as appropriate, if applicable.
15. Run B4A and B4J (by double-clicking the desktop icon) and configure the paths via Tools->'Configure Paths' in both; in B4A, the SDK Manager will not work but - as mentioned on the B4X site - you don't need it. If for some reason you would want/need it, see section 'Android SDK Manager' below. If you used the paths from this post, you can copy and paste the following information for the first two:
- javac.exe: C:\java\jdk-11.0.1\bin\javac.exe
- android.jar (for SDK level 30): C:\android\platforms\android-30\android.jar
- Additional Libraries: that's a custom one from you
- Shared Modules: that's a custom one from you
16. [B4A] In B4A, don't forget to set/load your Private Sign Key (from the 'Tools' menu). Failing to do so, you won't be able to install existing apps on your devices as for Android they will appear to come from a different creator.
17. [B4A] NOTE: when connecting B4A Bridge, a message pops up stating 'Ping failed (IP = xxx.xxx.xxx.xxx): The IP address is most probably incorrect. Do you want to use it?'; click 'Yes', it won't stop you from connecting to your Android device.
19. [B4A] adb must be version 1.0.40 for both Windows (for Wine) and Linux (platform tools 28.0.2); you can check this with
B4X:
adb version20. [B4J]
B4X:
mkdir /home/YOUR_USER_NAME/java
mkdir /home/YOUR_USER_NAME/B4X
mkdir /home/YOUR_USER_NAME/B4X/platform-tools
21. [B4J] Download B4JPackager11 from https://www.b4x.com/android/forum/t...the-simplest-way-to-distribute-ui-apps.99835/, compile it, and copy file 'B4JPackager11.jar' from the project's Objects folder to Linux directory /home/YOUR_USER_NAME/B4X.
22. [B4J]
Download and unzip https://b4xfiles-4c17.kxcdn.com/b4j/linux_jdk-11.0.1.zip as per https://www.b4x.com/android/forum/threads/b4jpackager11-the-simplest-way-to-distribute-ui-apps.99835 and extract (e.g. via 'Files', the file manager) its contents to /home/YOUR_USER_NAME/java so that directory 'jdk-11.0.1' now exists in that directory.
23. [B4A]
B4X:
mv /home/YOUR_USER_NAME/virtualwinedrives/b4x64/drive_c/android/platform-tools /home/YOUR_USER_NAME/virtualwinedrives/b4x64/drive_c/android/platform-tools-r30
mkdir /home/YOUR_USER_NAME/virtualwinedrives/b4x64/drive_c/android/platform-tools
mkdir /home/YOUR_USER_NAME/B4X
mkdir /home/YOUR_USER_NAME/B4X/platform-tools
24. [B4A] Extract (e.g. via 'Files', the file manager) the Windows adb 1.0.40 (platform-tools_r28.0.2-windows.zip) you downloaded from the Dropbox link to /home/YOUR_USER_NAME/virtualwinedrives/b4x64/drive_c/android/platform-tools so that several new directories now exist in that directory.
25. [B4A] Extract (e.g. via 'Files', the file manager) the Linux adb 1.0.40 (platform-tools_r28.0.2-linux.zip) you downloaded from the Dropbox link to /home/YOUR_USER_NAME/B4X/platform-tools so that several new directories now exist in that directory.
26. [B4A]
- Launch the text editor (click the Linux Mint menu button in the bottom left corner, type 'text' in the search box, click 'Text Editor')
- Right-click in the large pane on the right and click 'Show Hidden Files' if it's not already checked
- Navigate to 'Home'
- Double-click file '.bashrc' and add the following lines:
B4X:
# Start the Linux version of adb by just typing 'adb'
alias adb='/home/YOUR_USER_NAME/B4X/platform-tools/adb'
# Have the WINEPREFIX environment variable available at all times
export WINEPREFIX="/home/YOUR_USER_NAME/virtualwinedrives/b4x64"27. [B4J]
- Launch the text editor (click the Linux Mint menu button in the bottom left corner, type 'text' in the search box, click 'Text Editor')
- Right-click in the large pane on the right and click 'Show Hidden Files' if it's not already checked
- Navigate to 'Home'
- Double-click file '.bashrc' and add the following lines:
B4X:
# Start the Linux B4Jpackager by just typing 'b4jpkg'
# Note: this assumes that 'packager.json' is present in the current working directory and was properly edited
alias b4jpkg='/home/YOUR_USER_NAME/java/jdk-11.0.1/bin/java -jar /home/YOUR_USER_NAME/B4X/B4JPackager11.jar packager.json'28. - Launch the text editor (click the Linux Mint menu button in the bottom left corner, type 'text' in the search box, click 'Text Editor')
- Right-click in the large pane on the right and click 'Show Hidden Files' if it's not already checked
- Navigate to 'Home'
- Double-click file '.bashrc' and add the following lines:
B4X:
# Ensure CustomBuildActions will recognise '%windir%'
export windir="c:\windows"29. Log out, and log in again to make sure the updated .bashrc information will be available to all processes. (Possibly a
B4X:
source .bashrc30. [B4A] Check if adb is working (USB debugging must have been enabled in the Developer Options of the Android device):
- Connect your Android phone to the computer via USB
- In a Terminal window, type
B4X:
adb devices
B4X:
List of devices attached
041c68157d25 device31. [B4J] If you intend to use InnoSetup to produce single-file installers for your B4J programs, download it from https://jrsoftware.org/isinfo.php and install it with
B4X:
wine innosetup...That's it. You should now be able to use B4A and B4J on Linux! Make sure you read the 'Useful tips' section below; it may save you a lot of time if strange things (don't) seem to be happening.
*** Compiling and running your programs ***
B4A:
Business as usual, run the IDE, connect to your device with B4A Bridge (ignore the 'can't ping' warning) and do your thing.
B4J - non-UI programs:
Run the IDE, compile your program, use the jar file; nothing additional needs to be done.
B4J - UI programs - running on a system that has Java installed (assuming you installed Java under /home/YOUR_USER_NAME/java/jdk-11.0.1):
B4X:
/home/YOUR_USER_NAME/java/jdk-11.0.1/bin/java --module-path /home/YOUR_USER_NAME/java/jdk-11.0.1/javafx/lib --add-modules ALL-MODULE-PATH -jar PATH_TO_YOUR_JARB4J - UI programs packaged to run on a system that doesn't have Java installed (some steps can be done differently - this is how I do it; also see 'A semi-automated way to get your B4J UI programs ready' below for an easier way to do this):
1. From the IDE, use option Project->'Build Standalone Package'; now, the Windows version is ready and a 'packager.json' file has been created
2.
B4X:
cd
mkdir B4Jprograms
cd B4Jprograms
mkdir YOUR_PROJECT_NAME
cd YOUR_PROJECT_NAME
3. If, as suggested before, you put your B4X projects under your Documents directory, you'll find the project folder and its subfolders there
4. From the project's Objects folder, copy the jar file and 'packager.json' to /home/YOUR_USER_NAME/B4Jprograms/YOUR_PROJECT_NAME
5. Edit packager.json as appropriate; you may need to adjust values such as the path to the icon file
6.
B4X:
b4jpkg7. A new directory 'temp' is created which contains directory 'build' which contains file 'run.command'
8. To start the program, do this:
B4X:
cd temp/build
./run.command
*** A semi-automated way to get your B4J UI programs ready ***
This is useful to prepare programs to run on a system that doesn't have Java installed. Obviously, all this happens in the Linux environment. Two steps are involved:
A. CopyFilesForLinuxify (runs under Wine as a CustomBuildAction): prepares the necessary files for Linuxify
B. Linuxify (runs natively under Linux): packages your program and produces an executable script to launch it
A. CopyFilesForLinuxify
1. Compile the attached 'CopyFilesForLinuxify' project and copy its jar (from the project's Objects folder) to your B4J 'Additional libraries' directory.
2. You'll need a top-level directory in which subdirectories will be created that will hold your B4J projects' executables. In this section, I will assume that this directory is '/home/YOUR_USER_NAME/Documents/B4Jprograms'. CopyFilesForLinuxify will create that directory if it doesn't already exist.
3. Important: CopyFilesForLinuxify determines whether or not it is running on Linux under Wine. If not, it doesn't produce the target files (it does, however, delete the temp directory if so instructed). Environment variable 'WINEPREFIX' must be set to a non-empty string value in the Linux environment; if you followed the instructions in section 'Making it work', this will have been done.
4. Now, all you have to do is add this CustomBuildAction to your B4J UI programs (and edit it for each program):
B4X:
#CustomBuildAction: after packager, %ADDITIONAL%\CopyFilesForLinuxify.jar, "C:\Users\YOUR_USER_NAME\My Documents\B4Jprograms" MyProgram Y ..\icon.icon- the full path of the directory mentioned in (2)
- the project's jar file name without path or extension
- Y to delete the temp folder, N to leave it alone (this is the folder that is created by B4Jpackager11)
- optionally, the path to the icon file you want to use for your project; most likely the same one that you specified for '#PackagerProperty: IconFile' if you did so
5. Finally, use Projects -> Build Standalone Package to compile your project, build the package, and prepare the necessary files for Linuxify. A new directory with the same name as your project will be created under '/home/YOUR_USER_NAME/Documents/B4Jprograms', and the project's jar and packager.json files that were created by B4Jpackager11 will have been copied to it.
B. Linuxify
I am assuming that you have used the paths (for java and B4JPackager11) that were suggested in section 'Making it work'.
Once, to prepare Linuxify for use on the target Linux system:
- Build the attached project with B4J on Windows (or on Linux under Wine): Project -> Build Standalone Package
- Folder Objects\temp can be deleted
- In folder Objects, edit packager.json and remove path information, just keep the filenames
-
B4X:
cd
mkdir Linuxify
-
B4X:
cd /home/YOUR_USER_NAME/Linuxify
/home/YOUR_USER_NAME/java/jdk-11.0.1/bin/java -jar /home/YOUR_USER_NAME/B4X/B4JPackager11.jar packager.json
-
B4X:
cd
B4X:
export home="/home/YOUR_USER_NAME"
alias b4jlin="/home/YOUR_USER_NAME/Linuxify/runme.sh"
B4X:
#!/bin/bash
CURDIR=$PWD
cd /home/YOUR_USER_NAME/Linuxify/temp/build/bin
./java @release_java_modules.txt -Dglass.win.uiScale=100% -m b4j/com.linuxify.main $CURDIR
exit 0
B4X:
chmod u+x /home/YOUR_USER_NAME/Linuxify/runme.shUsage (on native Linux, i.e. not under Wine):
- Navigate to the directory to which your program's jar and packager.json' files were copied with CopyFilesForLinuxify:
B4X:
cd /home/YOUR_USER_NAME/Documents/B4Jprograms/YOUR_PROGRAMS_DIRECTORY
B4X:
b4jlin- Click the 'Process' button (it appears once all required data have been entered/selected) to produce your 'linuxified' program
- You'll be able to follow the processing in the TextArea that will appear
- When processing is completed, the 'OK' button appears; click it to hide the TextArea
- The 'Target directory' you have chosen (the default is /home/YOUR_USER_NAME/Documents/B4Jprograms/YOUR_PROGRAM'S_DIRECTORY) will now contain all the required files; cd to it and use './run.command' to start your program
*** Android SDK Manager ***
As stated on the B4X site, the SDK Manager is no longer needed. However, if you still want/need to use it, here's how to get it to work:
-
B4X:
cp '/home/YOUR_USER_NAME/virtualwinedrives/b4x64/drive_c/Program Files (x86)/Anywhere Software/Basic4android/B4ASdkManager.jar' '/home/YOUR_USER_NAME/virtualwinedrives/b4x64/drive_c/java/jdk-11.0.1/bin'- NOTE: the default installation folder for the 64-bit versions of B4A and B4J is 'Program Files' while the 32-bit versions use 'Program Files (x86)'. Modify the aforementioned path as appropriate, if applicable.
- Now you can run the SDK Manager with these commands, NOT from within the B4A IDE (Note: sdkmanager.bat is at: C:\android\tools\bin\sdkmanager.bat):
B4X:
cd /home/YOUR_USER_NAME/virtualwinedrives/b4x64/drive_c/java/jdk-11.0.1/bin
WINEPREFIX="/home/YOUR_USER_NAME/virtualwinedrives/b4x64" wine ./java.exe -Xmx1G -Dprism.order=j2d --module-path ../javafx/lib/ --add-modules=javafx.fxml,javafx.controls -jar ./B4ASdKManager.jar
- If you prefer a desktop icon to double-click, use Text Editor to create a file (give it extension '.desktop') in /home/YOUR_USER_NAME/Desktop with the following contents:
B4X:
[Desktop Entry]
Name=B4A SDK Mgr
Exec=env WINEPREFIX="/home/YOUR_USER_NAME/virtualwinedrives/b4x64" wine-stable C:\\\\windows\\\\command\\\\start.exe /Unix ./java.exe -Xmx1G -Dprism.order=j2d --module-path ../javafx/lib/ --add-modules=javafx.fxml,javafx.controls -jar ./B4ASdKManager.jar
Type=Application
StartupNotify=true
Path=/home/YOUR_USER_NAME/virtualwinedrives/b4x64/drive_c/java/jdk-11.0.1/bin
Icon=4732_B4A.0
Name[en_US]=B4A SDK Mgr
*** Useful tips ***
- If you don't like the IDE font under Wine, you can change it via Tools->IDE Options->Font Picker.
- Robocopy isn't available for Linux/Wine, so if the CustomBuildAction with Robocopy is present in your project, you'll have to turn it into a comment or replace it with something else. As xcopy.exe does exist in the Wine environment, these lines could be used in a B4XPages project (update the xcopy options "/..." with the ones you prefer):
B4X:
#CustomBuildAction: folders ready, %WINDIR%\System32\xcopy.exe,"..\..\Shared Files" "..\Files" /C /E /F /H /K /R /Y
'Ctrl + click to sync files: ide://run?file=%WINDIR%\System32\xcopy.exe&args=..\..\Shared+Files&args=..\Files&args=/C&args=/E&args=/F&args=/H&args=/K&args=/R&args=/Y&FilesSync=True
- If you run across the error relating to GLXBadFBConfig when running B4A or B4J, run this in a terminal window (error detail here - thanks to @TheJinJ for this hint):
B4X:
export MESA_GL_VERSION_OVERRIDE=4.5- To use B4X Localizator in a #CustomBuildAction , see this post (thank you, @Ivan Aldaz)
- [B4A] Under Wine, 'Documents' is 'My Documents' (when you use paths in e.g. #CustomBuildActions or in your code).
- [B4J] I've increased the process timeout in my B4J IDE (Tools->IDE Options->Configure Process Timeout) to 600 seconds. Use whatever value suits you best; if a compilation or standalone package build fails with 'process timed out' and you're certain that no process is hanging, increase that value.
- [B4J] If (like I have) a B4J program, running from within the IDE or externally to the IDE under Wine, apparently uses a Greek-looking font (which is actually the 'Standard Symbols' font), see here for a quick fix: https://www.b4x.com/android/forum/t...m-the-ide-uses-greek-font.148952/#post-944544
- [B4J] Msgbox text sometimes seems to be truncated after a couple of lines. I didn't find a solution to this, so here's a workaround I use when I know a long text will have to be displayed:
B4X:
' Was created because at least OpenJDK Java 11 64bit on Linux truncates the MsgBox text (both fx and XUI) after 2 or 3 lines.
' Requires library 'XUI Views'.
' Returns a ResumableSub object.
' Usage:
'     Wait For(MsgBoxLongText(MainForm, 500dip, 300dip, "This is the text", "Here is the title", "Yes", "No", "Cancel", xui.Color_Red)) Complete (result As Int)
'     If Result = xui.DialogResponse_Positive Then ...
Public Sub MsgBoxLongText(frm As Form, width As Int, height As Int, msg As String, title As String, positiveBtnText As String, negativeBtnText As String, cancelBtnText As String, borderColour As Int) As ResumableSub

    Dim fnt14 As B4XFont = xui.CreateDefaultFont(14)
    Dim LongTextTemplate As B4XLongTextTemplate
    Dim dlg As B4XDialog

    dlg.Initialize(frm.RootPane)
    dlg.BackgroundColor = xui.Color_LightGray
    dlg.BlurBackground = True
    dlg.BorderColor = borderColour ' Edit 2021-09-22 - was: "IIf(borderColour < 0, xui.Color_Red, borderColour)", but most XUI.Color_... values are negative
    dlg.ButtonsColor = xui.Color_White
    dlg.ButtonsFont = fnt14
    dlg.ButtonsTextColor = xui.Color_Black
    dlg.Title = title
    dlg.TitleBarColor = xui.Color_White
    dlg.TitleBarFont = fnt14
    dlg.TitleBarTextColor = xui.Color_Black

    LongTextTemplate.Initialize
    LongTextTemplate.Resize(IIf(width > 0, width, 500dip), IIf(height > 0, height, 300dip))
    LongTextTemplate.Text = msg

    Wait For (dlg.ShowTemplate(LongTextTemplate, positiveBtnText, negativeBtnText, cancelBtnText)) Complete (Result As Int)
    Return Result

End Sub
- As my laptop CPU is an AMD Ryzen and the system had intermittently frozen several times while running the IDE-internal B4J packager (this is an issue with Linux and the CPU, not with B4J or Java) I followed the instructions on https://easylinuxtipsproject.blogspot.com/p/bugs.html#ID27 (I could not do the first one as my BIOS config didn't seem to contain the 'PSU Idle Control' option), i.e.:
B4X:
apt install git && git clone git://git.kernel.org/pub/scm/linux/kernel/git/firmware/linux-firmware.git && sudo cp -v -u linux-firmware/amdgpu/* /lib/firmware/amdgpu && sudo update-initramfs -uk all
xed admin:///etc/default/grub
[change the line <GRUB_CMDLINE_LINUX=""> to <GRUB_CMDLINE_LINUX="idle=nomwait"> and save the file]
sudo update-grub
sudo rebootEDITS:
- 2024-09-15: added xcopy alternative suggestions for Robocopy in 'Useful tips'
- 2023-07-16: added a font-related tip to 'Useful tips'
- 2023-06-26: enhanced steps 3 (useful in case a certain error occurs), 9 (small change), and 12 (small change)
- 2023-02-08: added a warning about Wine 8.0.0 in section 'Making it work'
- 2022-07-06: small changes that don't affect the overall instructions
- 2022-06-26: added the 'Screen resolution' value change to step 3 (it will cause the B4J WYSIWYG Designer to be displayed properly)
- 2022-05-23: enhanced sections 'Compiling and running your programs' and 'A semi-automated way to get your B4J UI programs ready' to differentiate the B4J UI programs approach between systems that have/don't have Java installed
- 2022-05-02: added notes about the default B4X installation folders that changed with the arrival of the 64-bit versions
- 2022-03-13: added info about using B4X Localizator in a #CustomBuildAction to 'Useful tips'
- 2022-02-08: added comment about the GLXBadFBConfig error to 'Useful tips'
- 2021-11-15: added comment about Robocopy to 'Useful tips'
- 2021-09-30: added section 'A semi-automated way to get your B4J UI programs ready' and the attached projects
- 2021-09-30: in some references to file '.bashrc', the dot was omitted
- 2021-09-22: small correction in the 'MsgBoxLongText' Sub
Attachments

Last edited: